2022.12.19
“Let’s have fun with VOCALOID!” vol.5 -TAKE functoin for doubling-
Hello everyone! Thank you for reading "Let's have fun with VOCALOID!"
Vol.5 is a continuation of Vol.4. We are going to process and adjust the chorus and harmony tracks to make the sound fuller.
Please try doing it!
You can download VOCALOID6 Free Trial Version!
Please check an article which includes explanation for Installation and Authorization of VOCALOID6 free trial version.
You can download VOCALOID Editor file(vpr format) that completed to enter the data based on this article. Click the button below.
Duplicating the chorus
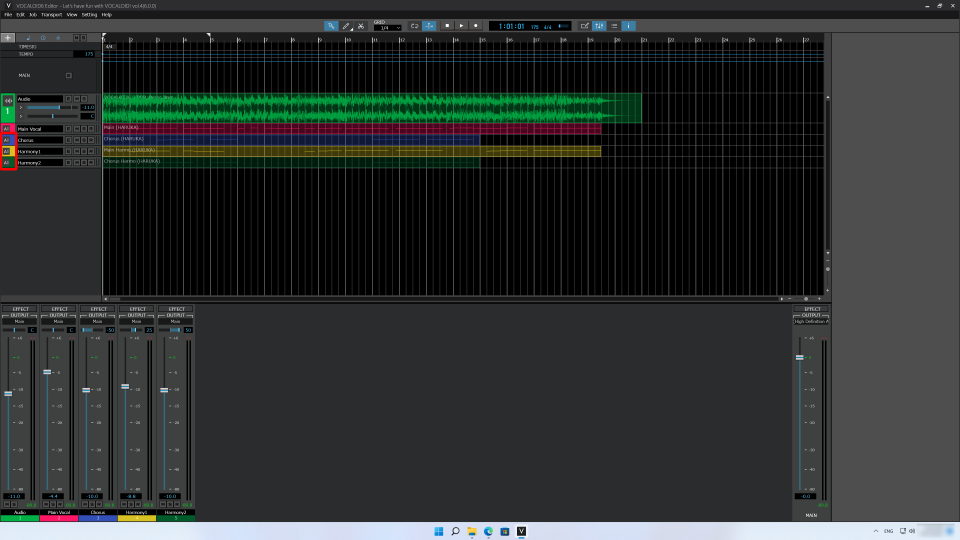
Now, the main vocal and the chorus have the same sound. Let’s change the settings of the sounds to make them different.
I will explain a technique called “doubling” that makes the sound fuller and richer by playing multiple copies of a voice at the same time. Doubling is a recording technique that widens the sound by having multiple instances of the same melody sung.
Multiple sound sources singing the same part are necessary for doubling. Doubling is created with people by recording them sing the same song multiple times.
In VOCALOID6, we can increase the number by copying tracks.
Before beginning this task, let’s change track colors to make them easier to identify. Click on the left side of a track name to open a color palette. Let’s change the colors of the Chorus, Harmony 1 and Harmony 2 tracks so they are all different.
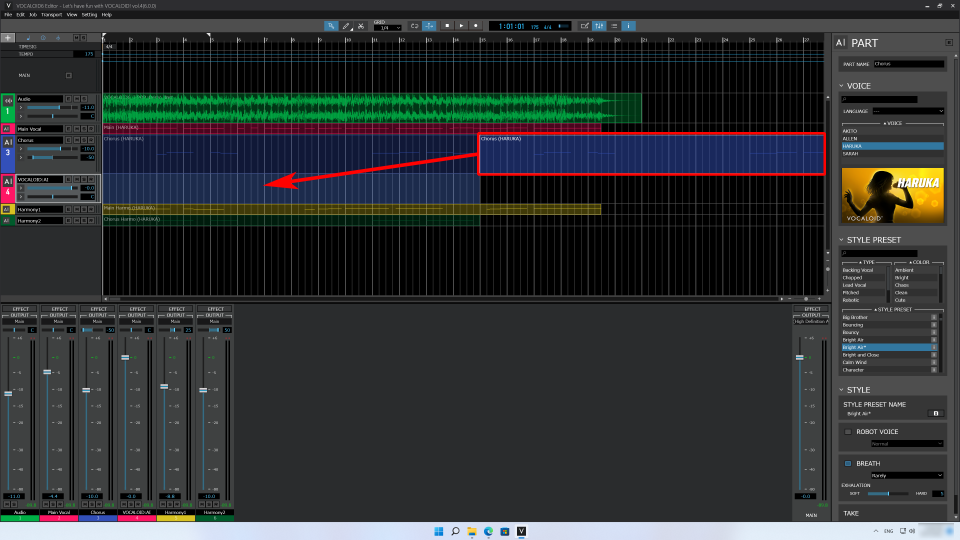
Next, we will duplicate the Chorus track.
With a part (rectangular frame containing data) in the Chorus track selected, select “Duplicate” from the Edit menu at the top. Let’s also make the track taller to make working with it easier.
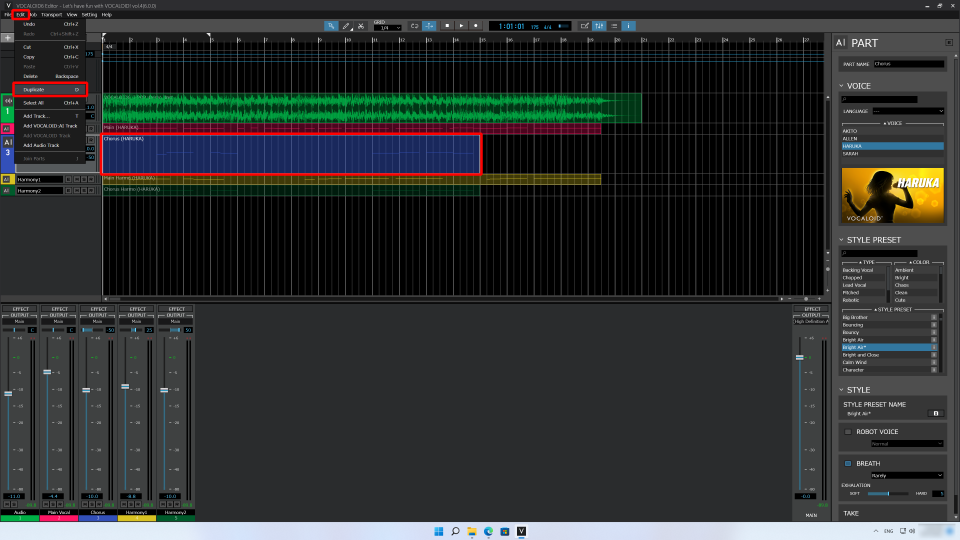
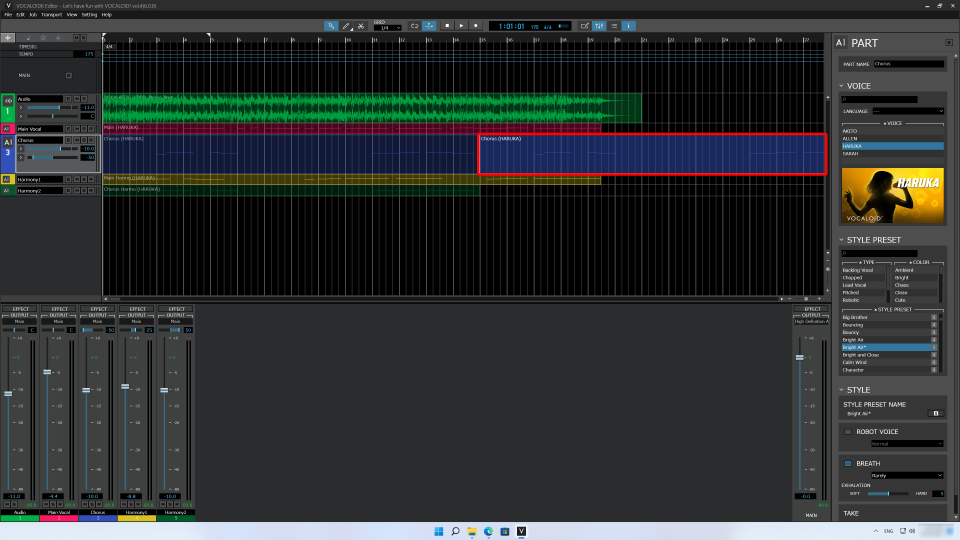
The selected part was duplicated, and its data appeared in a new part to its right.
Next, we will create a track to place the duplicated data. From the Edit menu at the top, select “Add VOCALOID:AI Track.”
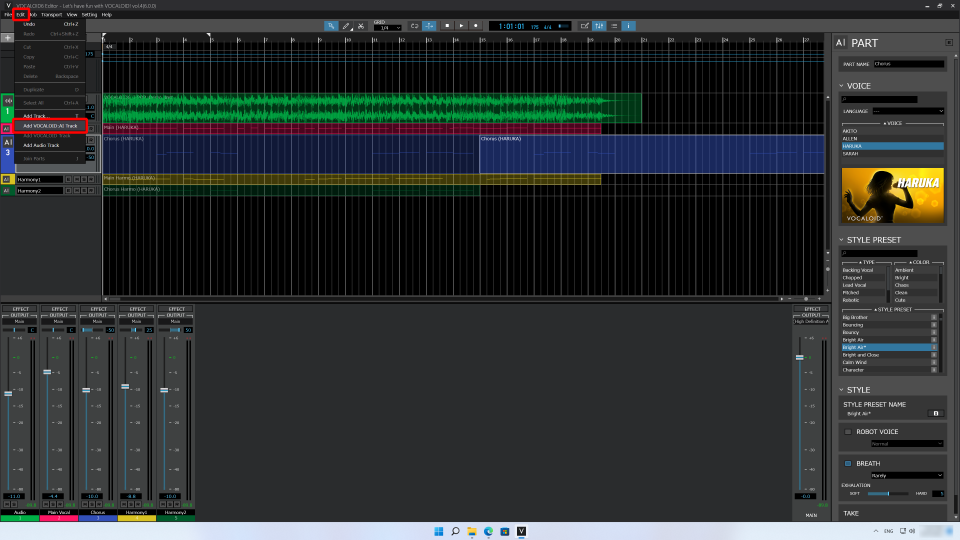
Drag-and-drop the part that we just created by duplicating to this new track. Be careful not to change the starting position.
Let’s change the name and color of the track. We will name this track “Chorus double.” Set the track color to be the same as the “Chorus” track.
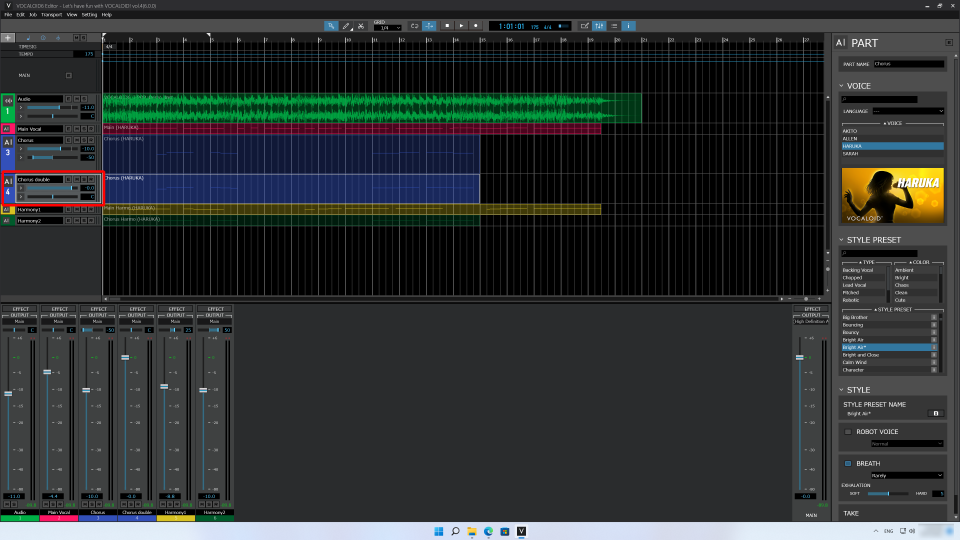
Track color:Blue -same as Chorus track-
We now have two chorus tracks, so let’s play them. Adjust volume levels if necessary.
We have two copies, but with exactly the same sound, all this does is increase the volume. The doubling technique requires multiple different sounds.
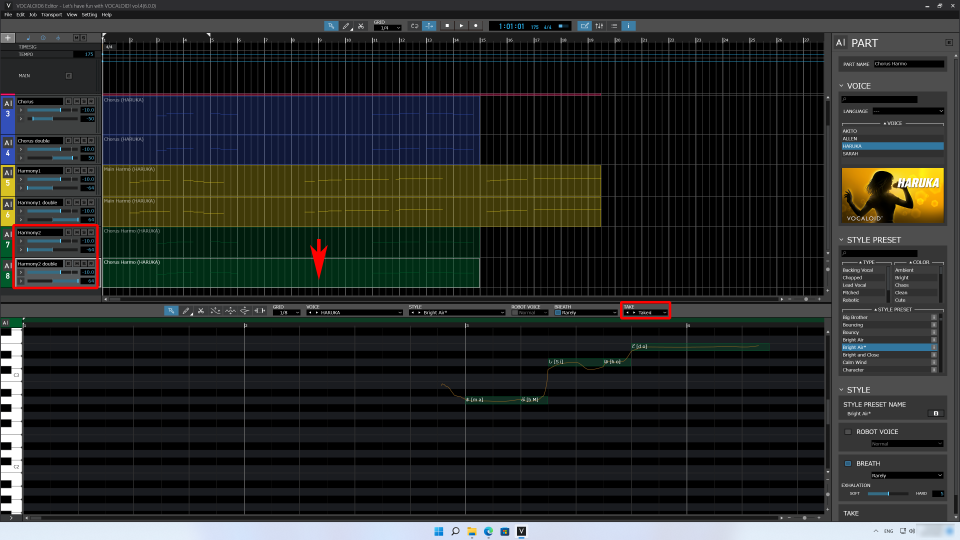
Using the TAKE function for doubling
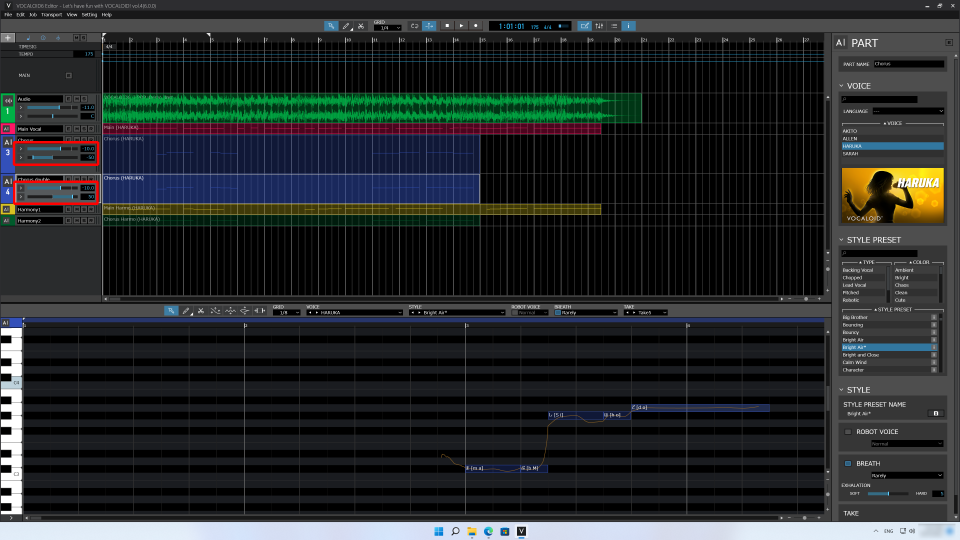
People would have to sing the part multiple times, but we can use the TAKE function in VOCALOID6 to make the sounds different in two tracks. The TAKE function, which is new in VOCALOID6, can produce different singing from the same data.
Double-click the part on the “Chorus double” track to open the Musical Editor. Set the TAKE field at the top right of the Musical Editor to “Take5.” Let’s play it.

When we play it, we can now hear two sounds because the two voices became different.
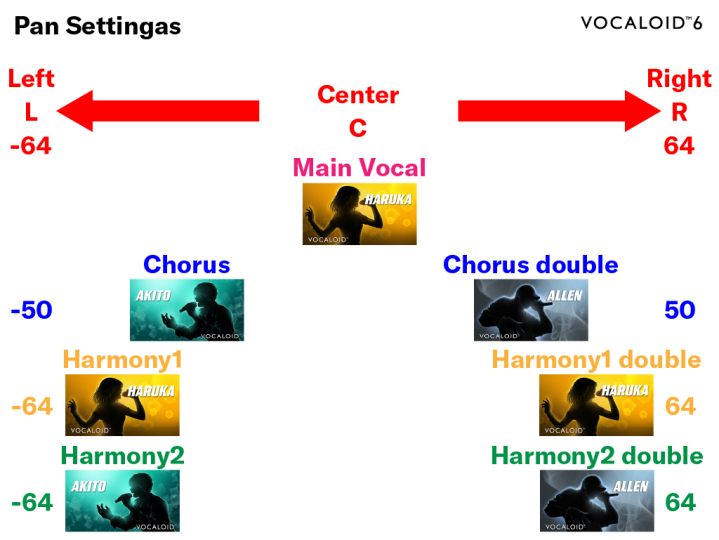
Let’s also adjust the panning to spread them out. Set the “Chorus” track panning to −50 and the “Chorus double” track panning to +50. Then, play it again.
We will set their volumes to the same levels. Set them both to −10.0. These settings can be adjusted on the Mixer Screen or with the sliders shown on the tracks. The top slider is for level, and the bottom slider is for panning.
After making the adjustments, let’s play it.
Volume:-10.0
You should be able to hear how the sound has become wider.
There are no particular rules for combining takes. The sound will become wider if two tracks used for doubling have different takes. Try using combinations as you like.
Doubling harmony tracks
Let’s double the Harmony 1 and 2 tracks in the same way that we doubled the Chorus track. The procedures are exactly the same.
Duplicate “Harmony 1” to create a “Harmony 1 double” track. Set their volumes to −10.0 and panning to −64/+64. You can choose any takes you like, but we will try combining “Take3” and “Take4.”
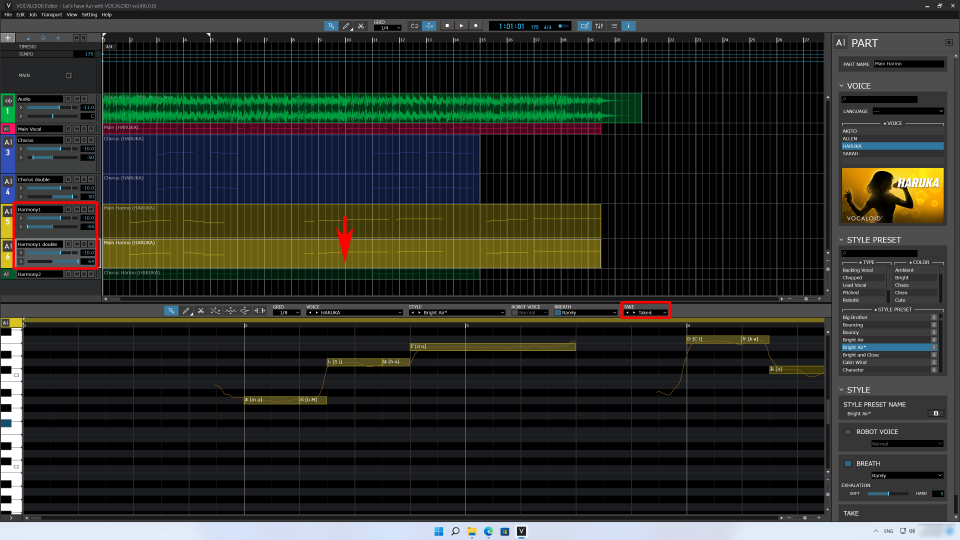
Double the Harmony 2 track in the same way.
Set the volumes for “Harmony 2” and “Harmony 2 double” in the same way as for “Harmony 1.” Set their volumes to −10.0 and panning to −64/+64. As with the Harmony 1 tracks, let’s use a combination of “Take3” and “Take4.”
Changing Voicebanks
Finally, we will change the voice banks to make the sound even richer.
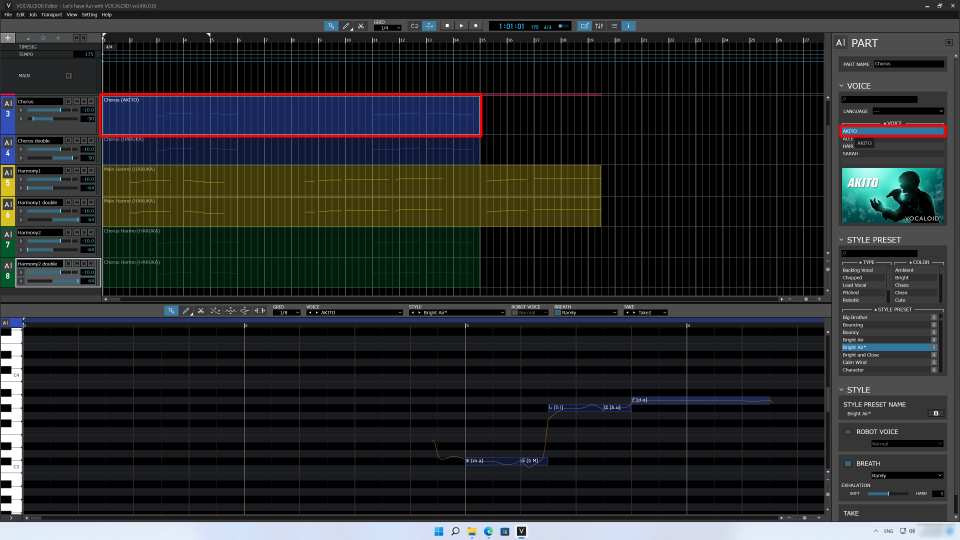
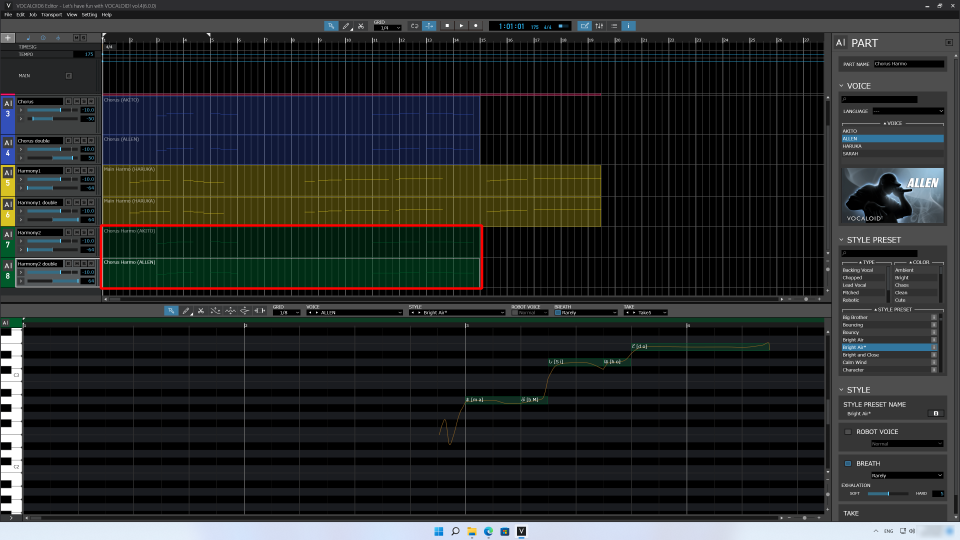
Keeping HARUKA as the main vocal, we will change the “Chorus” and “Chorus double” parts to AKITO and ALLEN, creating a male chorus. Select the part in the “Chorus” track, and change the voice bank shown in the Inspector to AKITO.
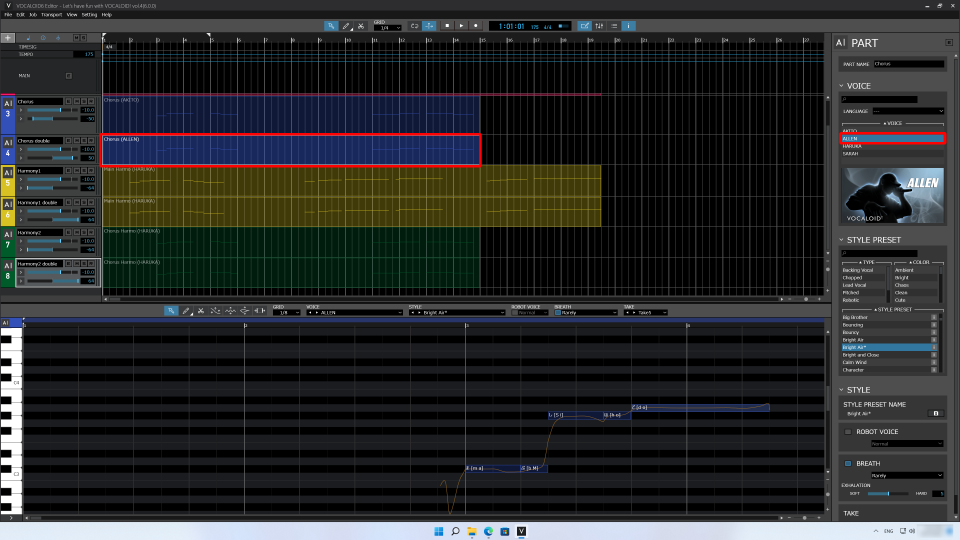
In the same way, select the part in the “Chorus double” track, and change the voice bank shown in the Inspector to ALLEN.
Since the “Harmony 2” and “Harmony 2 double” tracks are harmony parts for the “Chorus” and “Chorus double” tracks, we will match their voice banks. Change “Harmony 2” to AKITO and “Harmony 2 double” to ALLEN.
Playing it, the number of voices has increased and they are spread out, creating a rich sound.
Thank you for reading!
One strength of VOCALOID is that duplicating and changing voices, which is a lot of work when recording people, can be done easily. As you think about this article, try some of your own ideas. I believe that you will start hearing some appealing sounds.
The next article is the last in this series. We will work on adjusting sounds and exporting.
See you soon!