2024.03.28
Using VOCALOID3/4/5 voicebanks with VOCALOID6 and notes about compatibility
VOCALOID6 includes VOCALOID:AI, but it can still be used with the voicebanks that were used in VOCALOID3/4/5 voicebanks before the VOCALOID:AI feature was added.
This article explains how to use them and information about compatibility.
Contents
Using VOCALOID3/4/5 voicebanks with VOCALOID6
How to authorize VOCALOID voicebanks
VOCALOID6 and VOCALOID3/4/5 sequence file compatibility
Compatibility between VOCALOID:AI and VOCALOID tracks in VOCALOID6 Editor
Using VOCALOID3/4/5 voicebanks with VOCALOID6
VOCALOID6 can utilize two types of voicebanks: VOCALOID:AI and VOCALOID3/4/5. (We will refer to the latter as “VOCALOID” voicebanks from here on.)
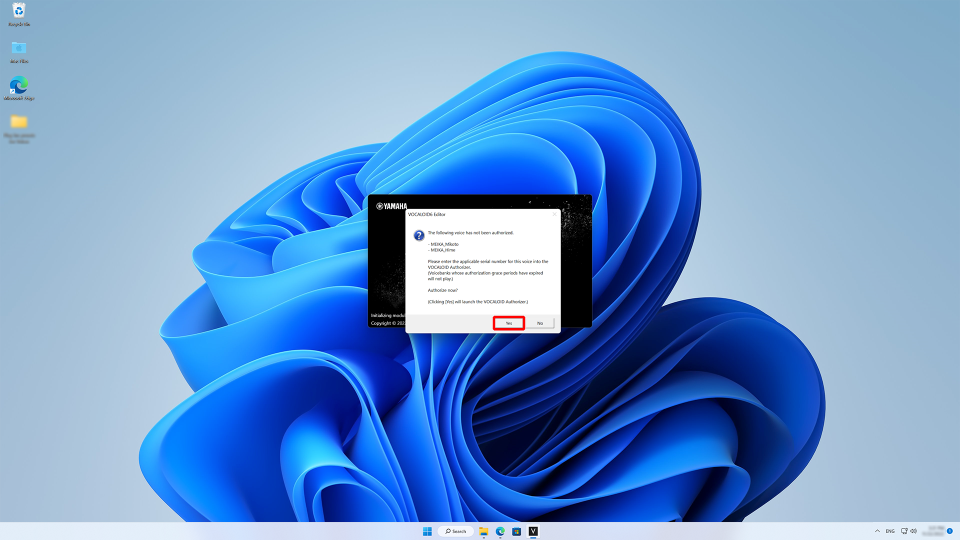
No particular settings are necessary for their use, but sometimes authorization is necessary.
If a message requesting authorization of a VOCALOID voicebank appears at startup, select “Yes” and quit VOCALOID Editor. Then, authorize it, following the procedures in “How to authorize VOCALOID voicebanks” in the second half of this article.
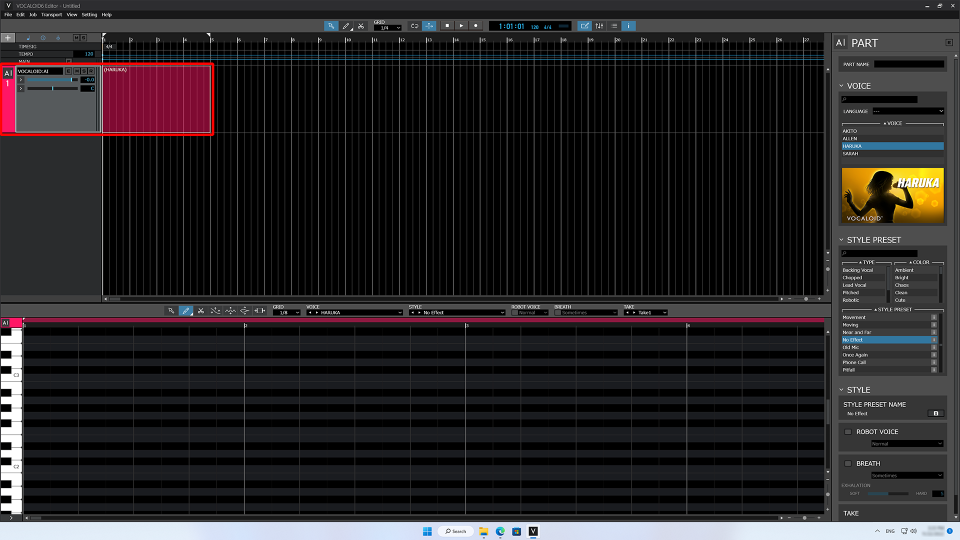
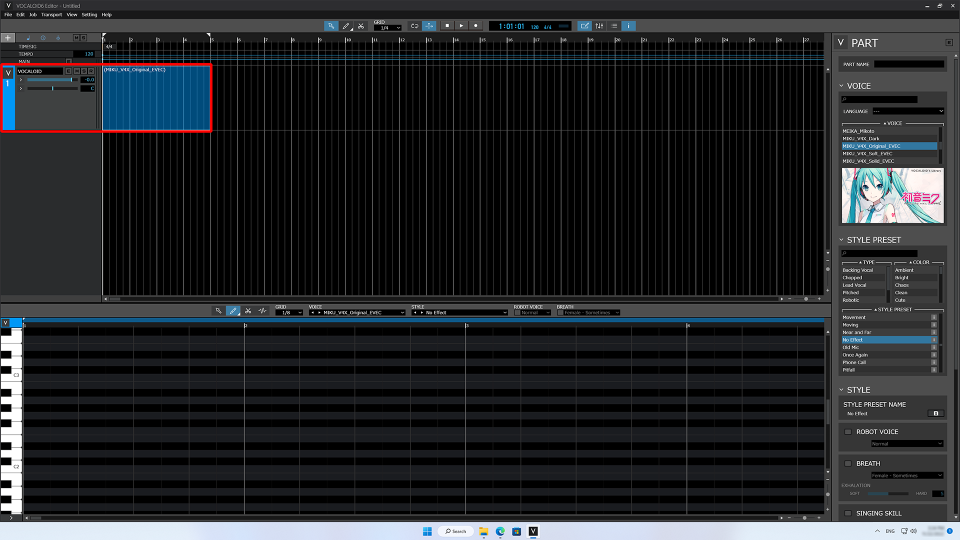
VOCALOID:AI voicebanks and VOCALOID voicebanks use different types of tracks.
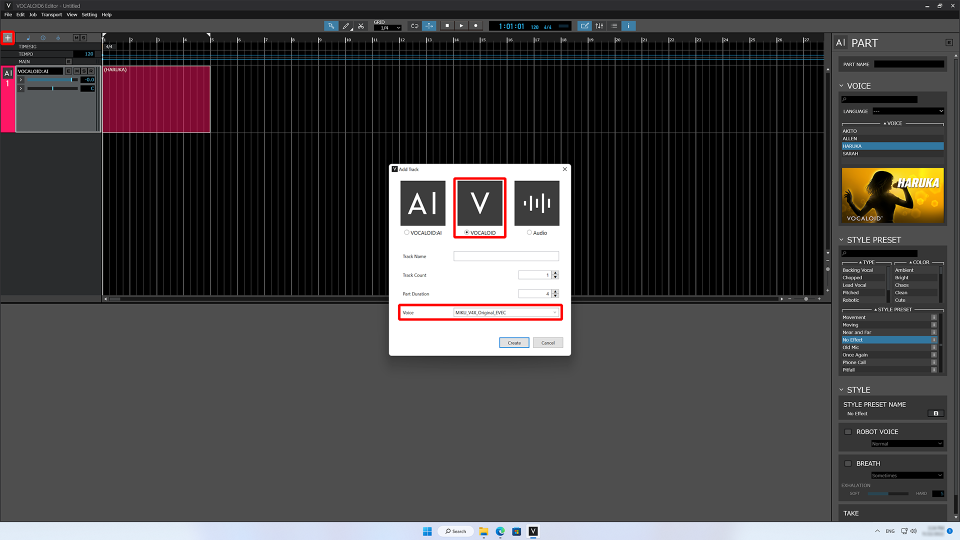
Click the "+button" at the top left of the screen to create a new track. Selecting “VOCALOID” will enable use of VOCALOID voicebanks. Select the desired voicebank, and click “Create”.
After creating a VOCALOID track, the voicebank can be changed using the Inspector.
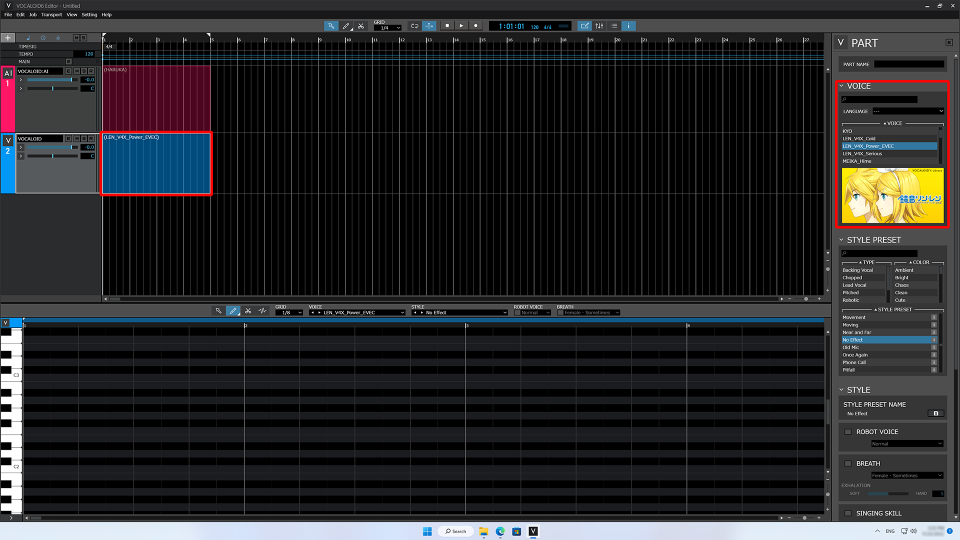
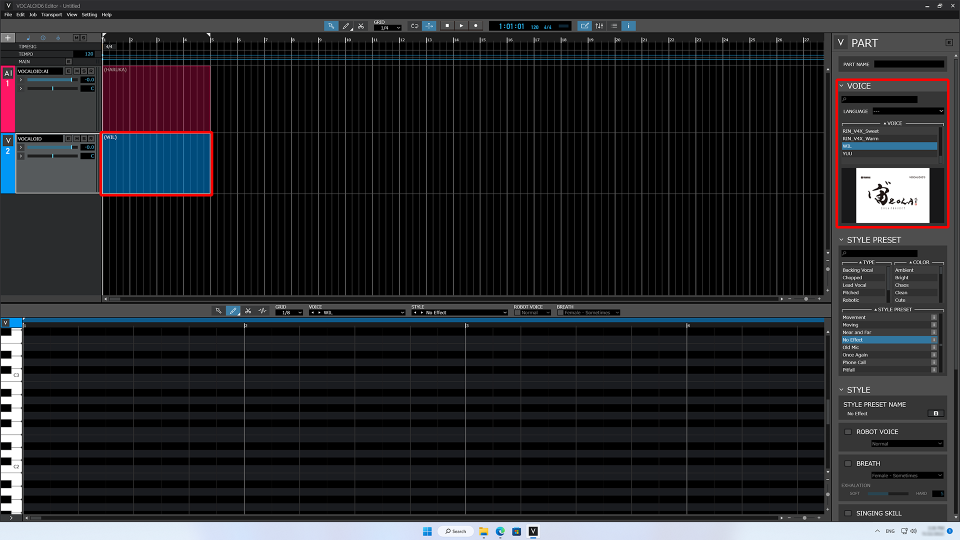
Voicebanks can also be selected using the pull-down VOICE menu in the MUSICAL EDITOR.
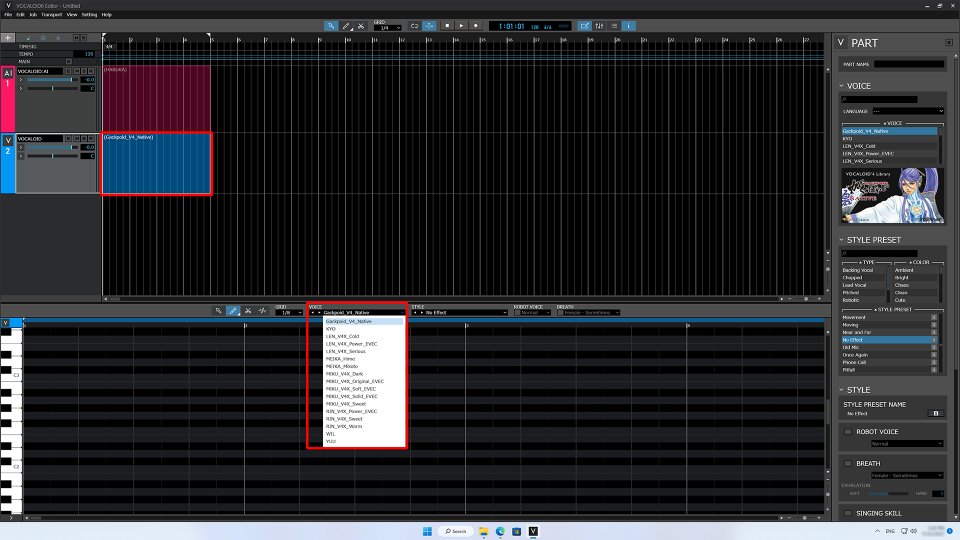
Note that only VOCALOID voicebanks are shown for VOCALOID tracks. VOCALOID:AI voicebanks cannot be selected.
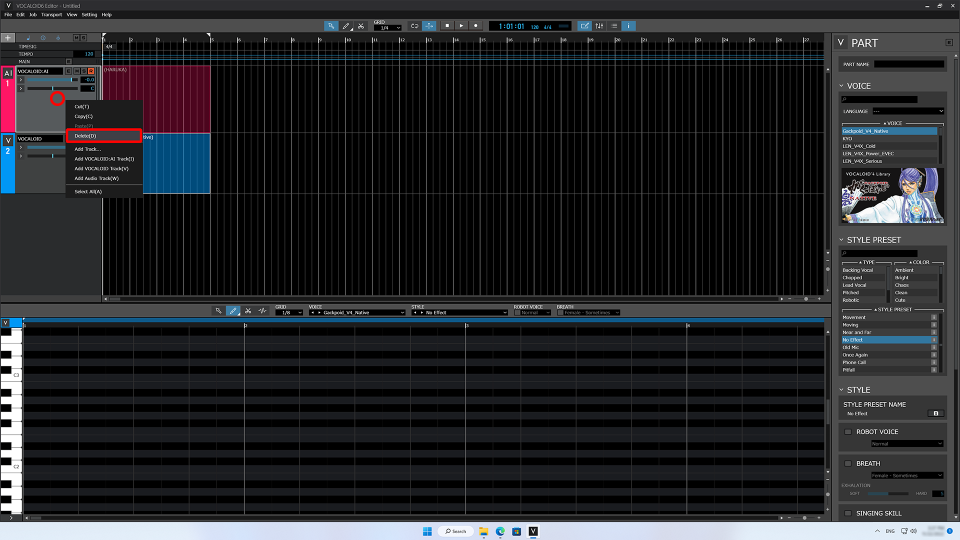
If your VOCALOID Editor version is less than 6.1, a VOCALOID:AI track is automatically created when you create a project. If you do not need it, delete it. Select the track, and right-click the red circle area to open a menu. Select “Delete” from the menu to delete the track.
How to authorize VOCALOID voicebanks
*The following authorization methods are compatible with version 6.1 or higher; if you are using less than 6.1, updating to version 6.1 or higher, or install of latest version of VOCALOID Authorizer.
If a message appears asking you to authorization, you will need to do the authorization process, which can be done the same way for all VOCALOID3/4/5/6. The following explanation is based on the Windows.
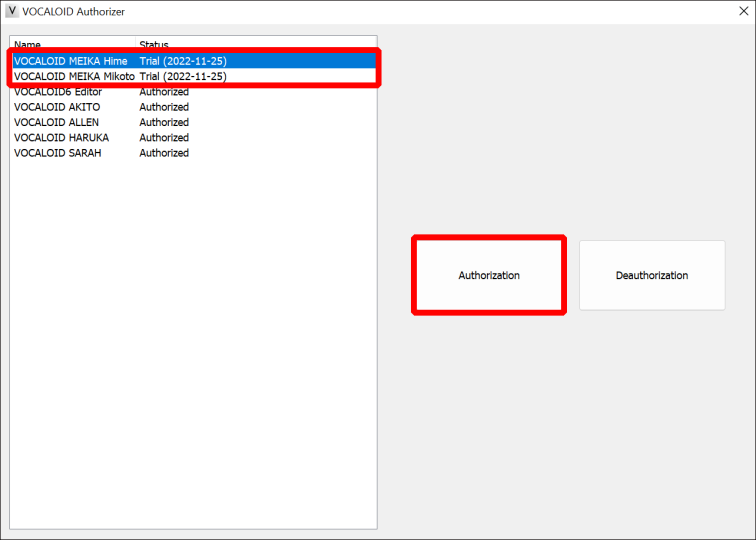
Use the VOCALOID Authorizer app to authorize voicebanks. VOCALOID Authorizer is installed automatically when VOCALOID6 is installed.
Installed voice banks will be shown when VOCALOID Authorizer is launched. Select a voicebank that requires authorization, and click “Authorization”.
Input the serial code (serial number) issued at the time of purchase in the “Authorization” area on the right side of the screen, and click “Next”.
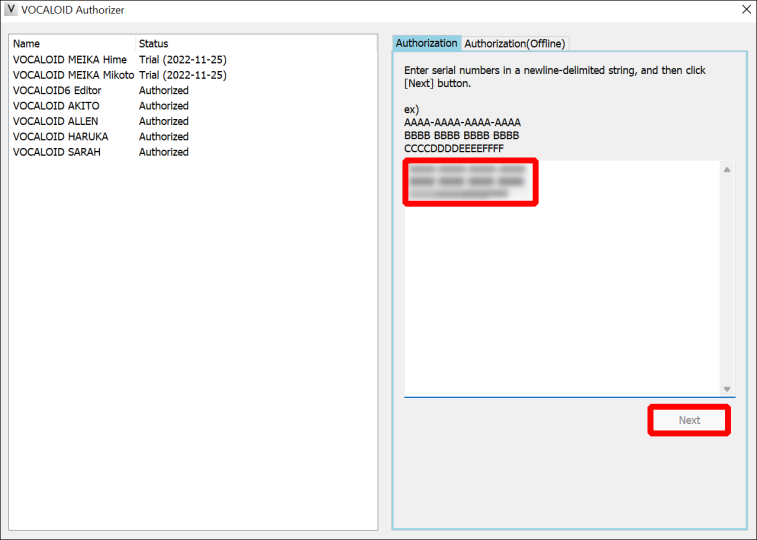
Note: Serial codes can be found in order confirmation e-mails received when purchasing downloads at the VOCALOID SHOP.
This completes activation.
VOCALOID6 and VOCALOID3/4/5 sequence file compatibility
Refer to the table below for information about compatibility with sequence files created with older versions of VOCALOID.
| Version | File format | VOCALOID track | Audio track |
| VOCALOID3 | VSQX | OK | NG |
| VOCALOID4 | VPR | OK | NG |
| VOCALOID5 | VPR | OK | OK |
- If VSQX format sequence files contain audio tracks, they will be opened with the audio files removed.
- If sequence files created with VOCALOID6 (VPR format) are opened by VOCALOID5, VOCALOID and audio tracks will be loaded. VOCALOID:AI tracks will be ignored.
- Sequence files created with VOCALOID6 (VPR format) cannot be loaded by VOCALOID 3/4.
Compatibility between VOCALOID:AI and VOCALOID tracks in VOCALOID6 Editor
In VOCALOID6 Editor, some of the data is compatible between VOCALOID:AI and VOCALOID, so data can be duplicated and moved by copying and pasting between these two types of tracks.
Compatible data
• Note data (pitch and length)
• Lyric data
• Pitch bend data
• Dynamics data
Incompatible data will be hidden after being pasted, so it will be restored if returned to a track of the original type.