2022.11.14
VOCALOID6 Setup guide for Cubase Pro / Artist
12th May 2026 *For information on issues related to the ARA2 feature that may occur when using VOCALOID6 Editor with Cubase version 15.0.20 or later, please see this page.
This article will explain how to use VOCALOID6 in Cubase Pro/Artist (hereafter referred to as Cubase) project. If you use VOCALOID6 in a Cubase project, you can also record VOCALOID6 information in the Cubase project.
In addition, as Cubase supports a function called ARA2 (Audio Random Access), it is possible to link VOCALOID6 in Cubase projects with the Cubase project.
*This article uses images from the Windows version, but the Mac version looks almost the same. For Mac users, please use this article as a reference for the settings.
*This article applies to Cubase Pro and Cubase Artist Ver. 12.0.50 or later. Please upgrade Cubase if you have an earlier version.
1. Start Cubase and create a project
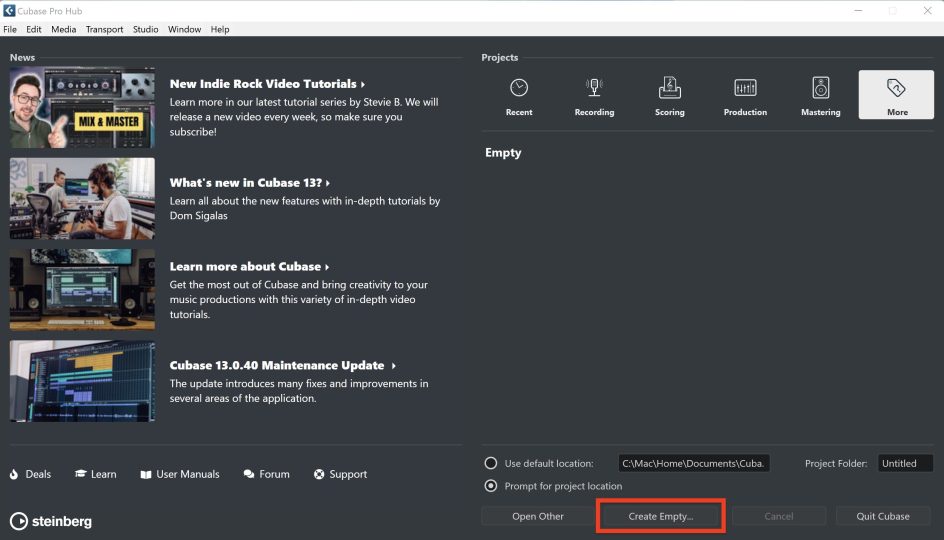
Start Cubase and create a project.
To create an empty project, select [Create Empty...] from the Steinberg Hub.
2. Create an instrument track and start VOCALOID
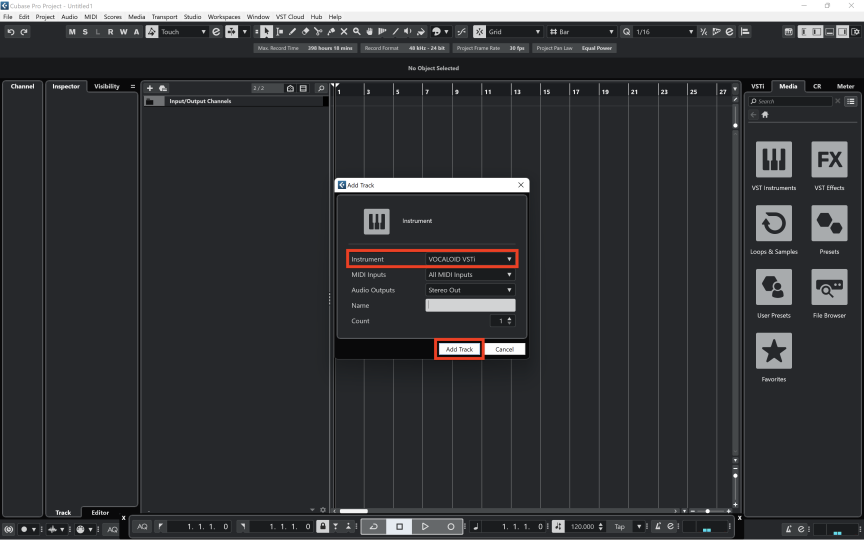
Once the project is created, create an [Instrument] track for VOCALOID.
Select [Project > Add Track > Instrument].

Click the [Instrument] menu on the screen and select [VOCALOID VSTi] from the list.
Click the [Add Track] button.
3.Configure VOCALOID Bridge
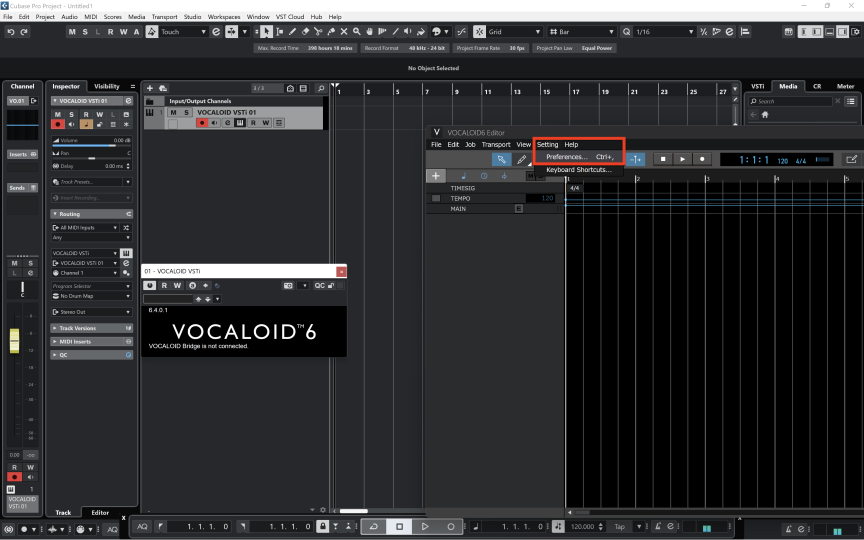
On the VOCALOID that has launched in previous step, select [Setting > Preferences...].
*For mac version : [Menu > VOCALOID6 Editor > Preferences].
Place a check in "Allow connection with VOCALOID Bridge plug-in" under "Details", and then reload the VOCALOID VSTi plug-in.
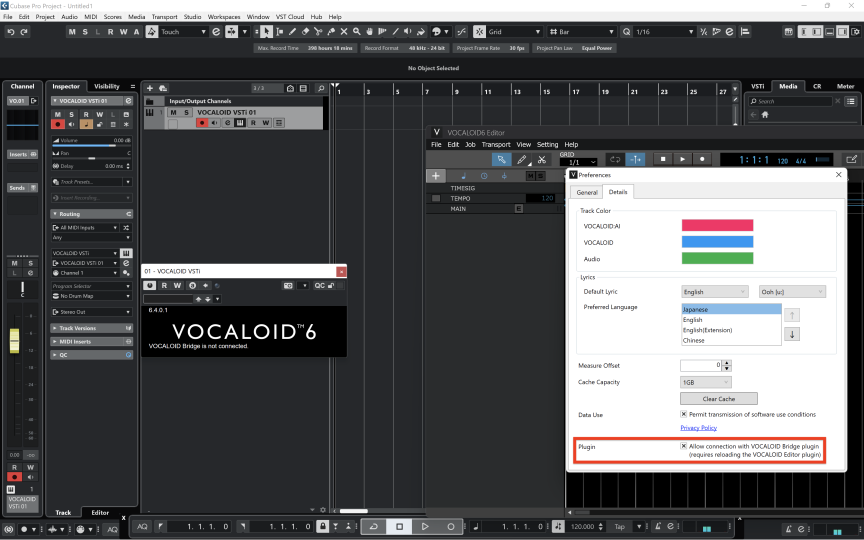
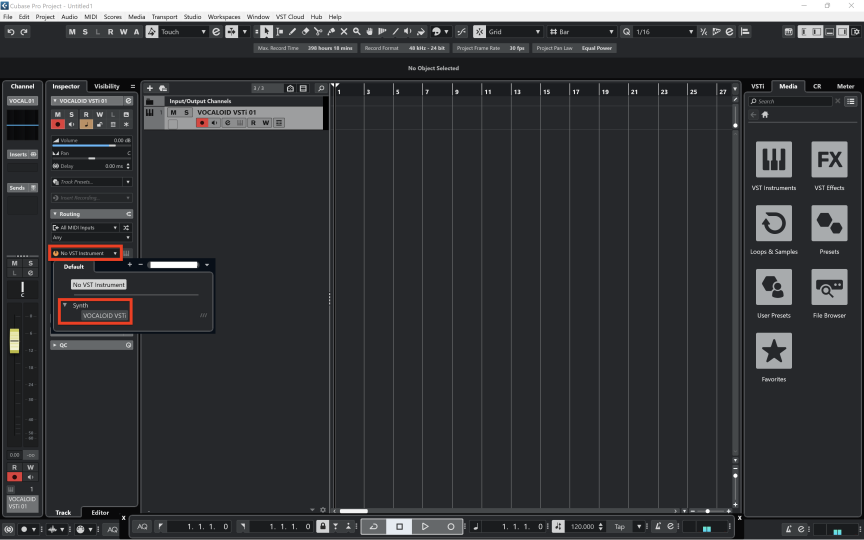
Close Preferences pop-up. Then, select [No VST Instrument] from the instrument slot. The VOCALOID VSTi requires re-loading after changing preferences.
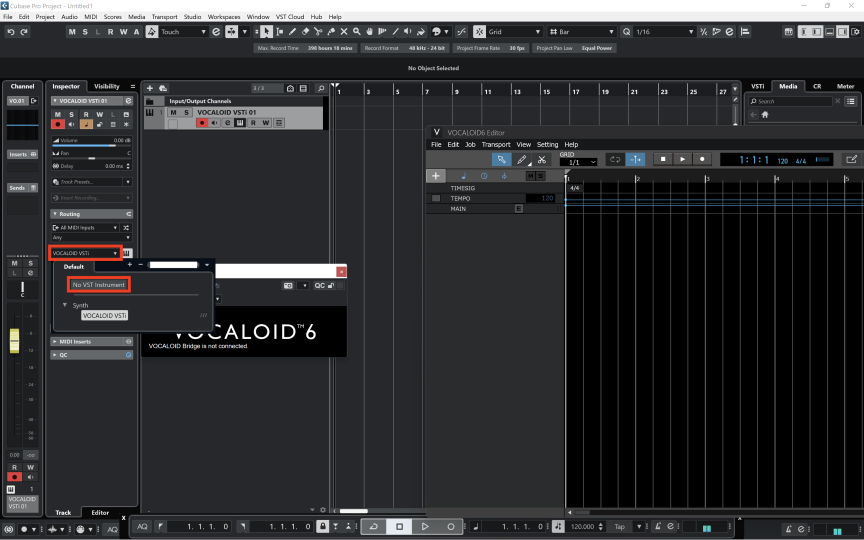
After removing, please re-launch "VOCALOID VSTi". Select "VOCALOID VSTi" from the instrument slot again.
4.Configure ARA2
Next, let's set up "ARA2" necessary to synchronize the playback of Cubase and VOCALOID.
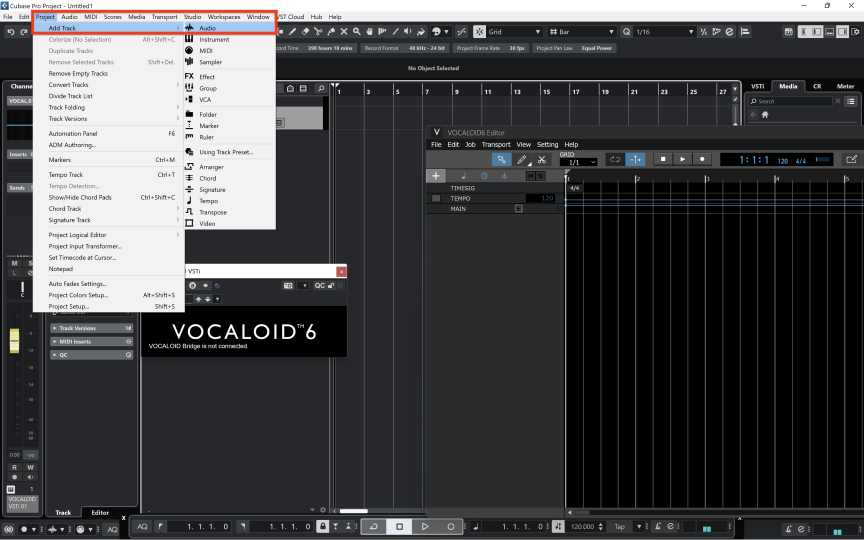
Create an audio track on Cubase. Select [Project > Add Track > Audio].
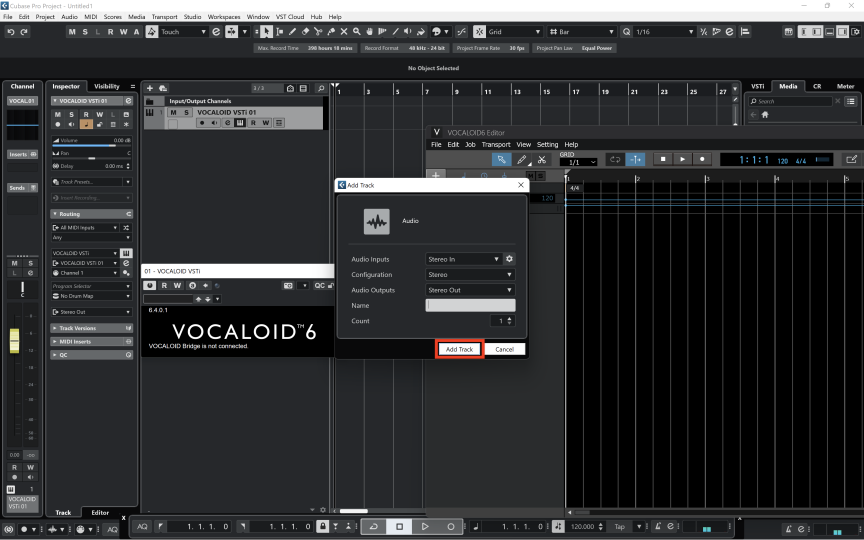
There is no need to change any settings. Just click the [Add Track] button.
To use ARA2, an audio file must be placed on the audio track. Here, the next step is how to create a silent audio file and use it as an ARA2 file.
Press the [Record] button on the transport to record to the audio track then immediately press the [Stop] button to end the recording.
* A "silent" audio file is placed on the track.
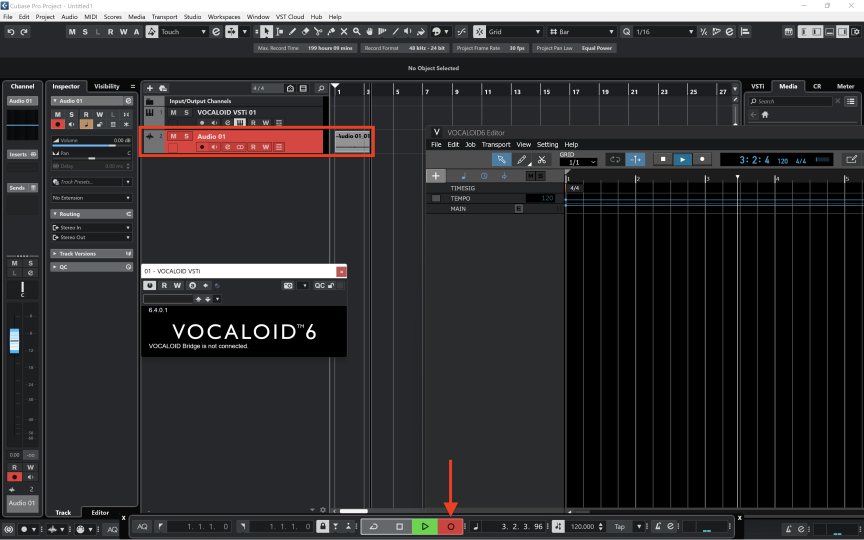
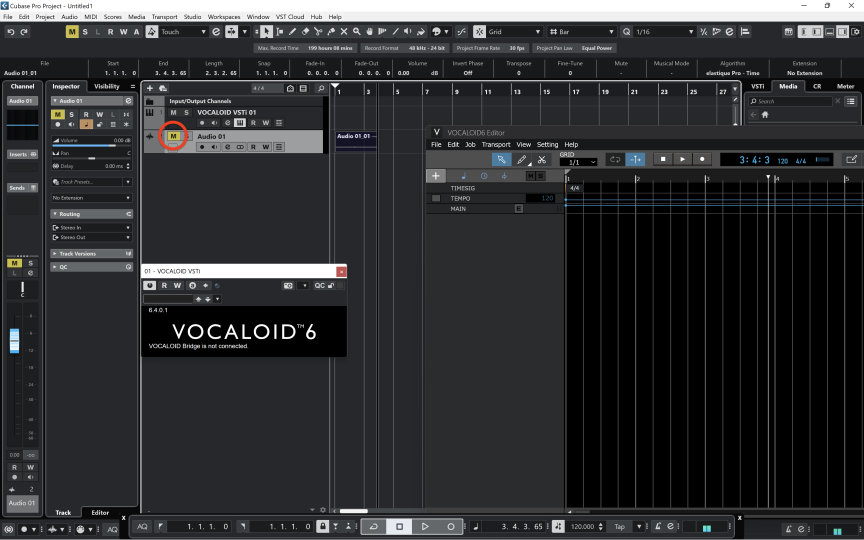
As the audio part recorded in previous step will not be used, mute the track so that there is no sound.
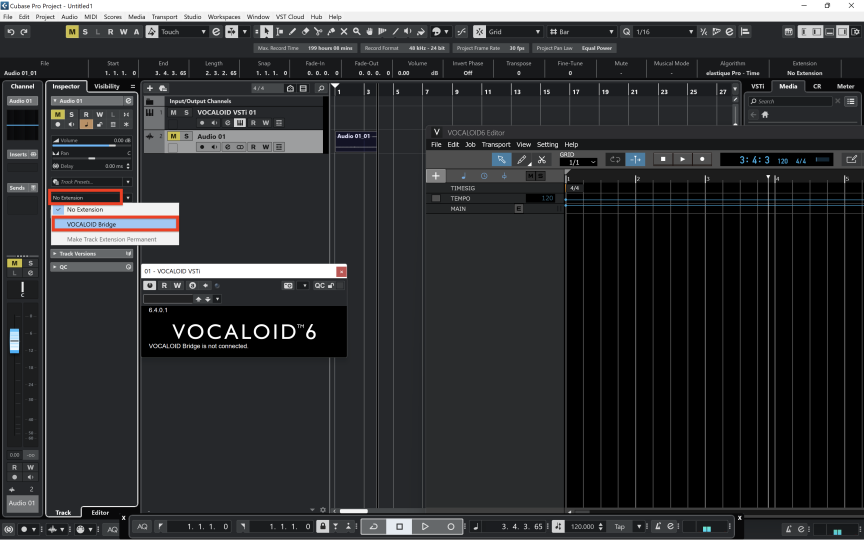
Click the extension item in the audio track Inspector and select [VOCALOID Bridge] from the list.
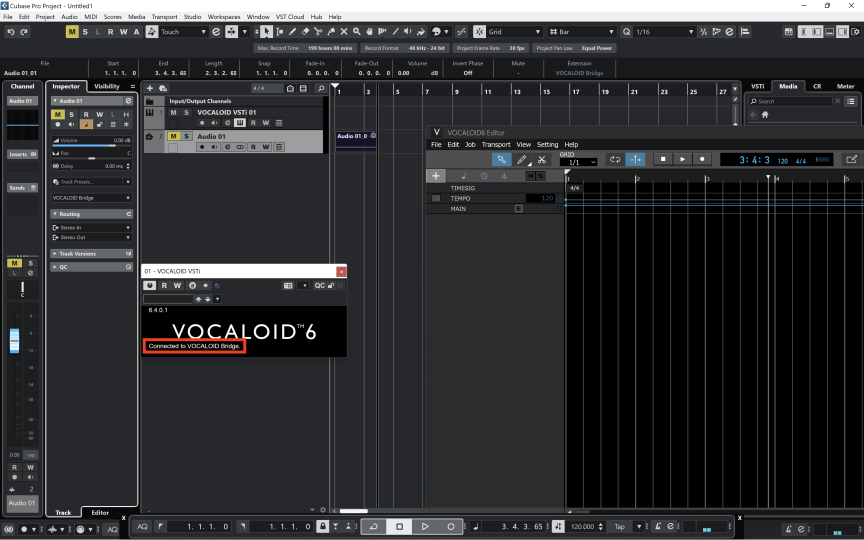
If the message [Connected to VOCALOID Bridge] appears from the screen of the VOCALOID VSTi created in step 2, the setting is completed.
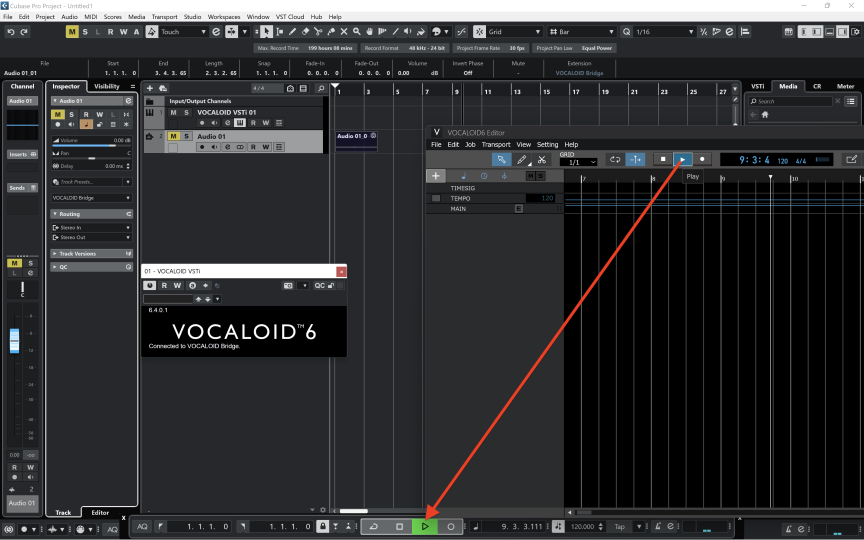
5. Confirm operation
Lastely, let's confirm VOCALOID is working properly.
Play and stop the project by clicking [Play] button in Cubase. VOCALOID will play and stop in conjunction with Cubase.

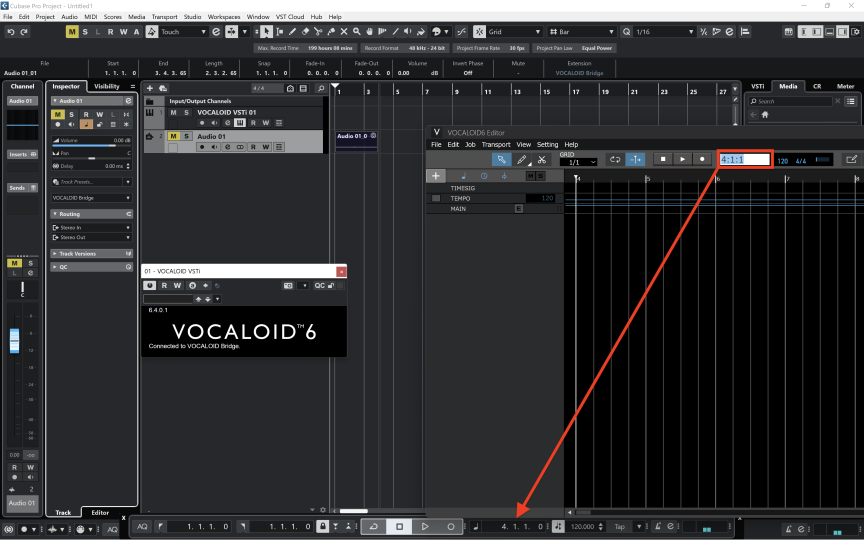
Now click the [Play] button in the VOCALOID screen. Cubase also plays/stops in conjunction with VOCALOID.
Let's change the playback position on the VOCALOID screen. In conjunction with VOCALOID, Cubase's playback position also follows.
The playback position can be moved by double-clicking [TimeDisplay] and entering a numerical value, or by clicking the [Ruler (the part where 1, 2, 3, 4 and the number of bars are written)] with the mouse.
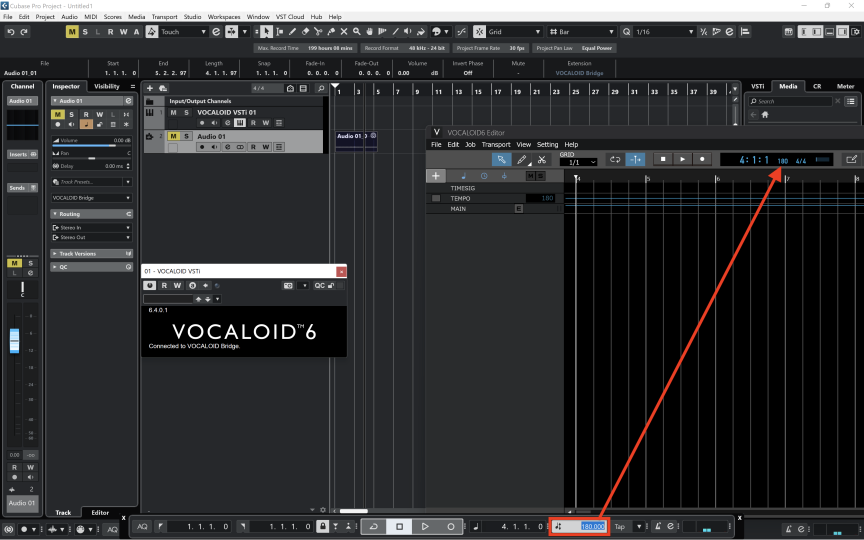
Let’s try changing the tempo in Cubase. The VOCALOID playback tempo will follow the tempo in Cubase.
Note: You cannot set the tempo in Cubase from the VOCALOID6. Please set the tempo in Cubase.
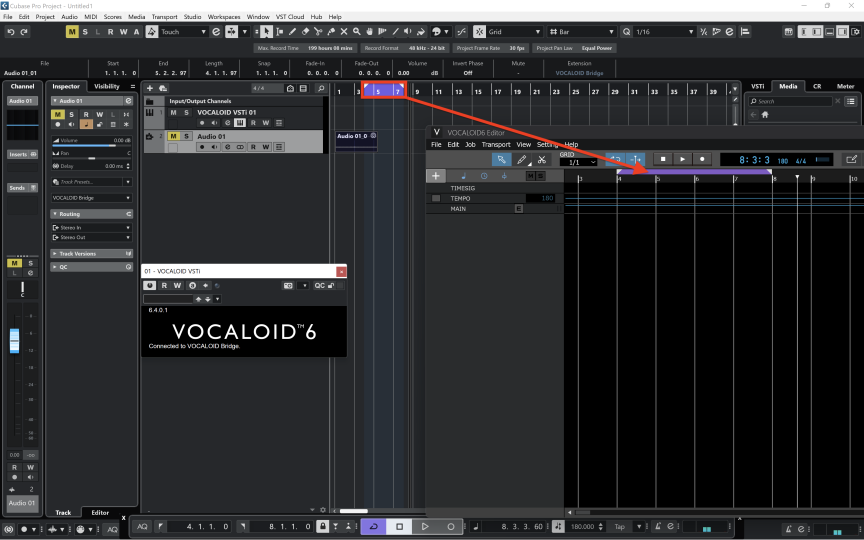
Use the start and end markers in the Ruler to select the repeat range. One the range has been selected, turn the [Repeat] button [ON (light)] and play it. VOCALOID and Cubase will play the selected range of bars repeatedly until stopped.
The settings for VOCALOID has been completed in Cubase.