2022.09.15
VOCALOID6 Installation and Authorization (Mac)
VOCALOID6 consists of two softwares: the VOCALOID6 Editor, which is software for editing VOCALOID data, and the Voicebank, which contains VOCALOID voice data.
This article explains how to install the Mac version of VOCALOID6 (Editor and Voicebanks) for those who have purchased VOCALOID6.
1. Download VOCALOID6 files
Enter the "VOCALOID SHOP DOWNLOAD CODE" into the following download site. The code and the dowonload site url listed in the e-mail you receive after purchase.
Find "VOCALOID6 Editor for Mac" and "VOCALOID6 Voicebanks for Mac" in your purchase history and click the [Download] .
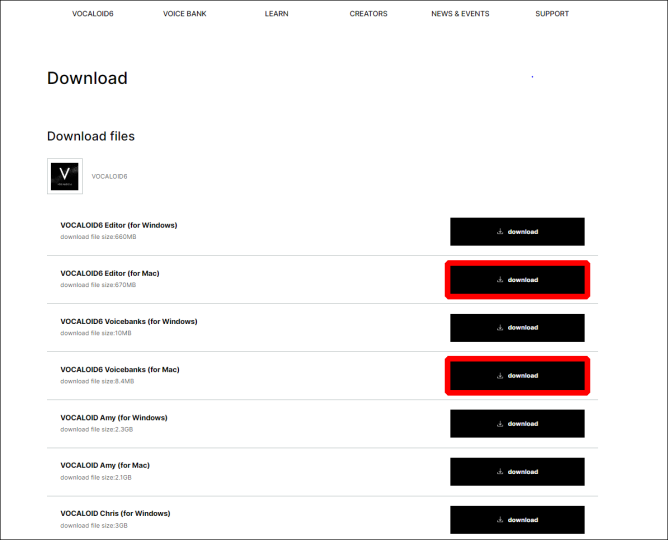
- The file size is approximately 680MB. We recommend downloading using a high-speed Internet environment.
- VOCALOID6 is made for PCs, so please download it on your PC.
2. Decompress the files
Open the location where the file downloaded in Step 1.
*By default, the files are saved in the [Download] folder.
*File names may change depending on when they were downloaded.
*The alphanumeric characters at the end of the file name indicate the software version, which varies depending on when the file was downloaded.
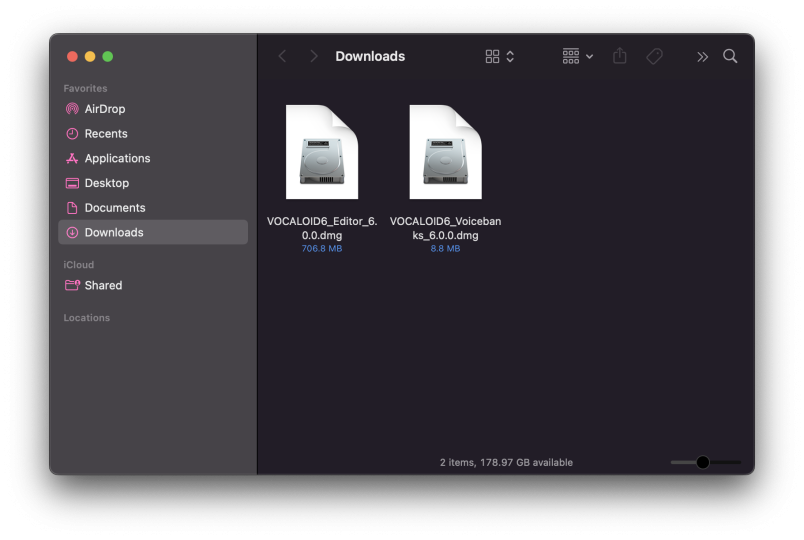
The downloaded file is compressed in zip format. By default, Mac OS automatically decompresses files when downloading.
Once extracted, two disk image files named "VOCALOID6_Editor_6.0.0.dmg" and "VOCALOID6_Voicebanks_6.0.0.dmg" will appear. These disk images contain the installers which is a dedicated software for install.
*The software for installing a software is called an "installer".
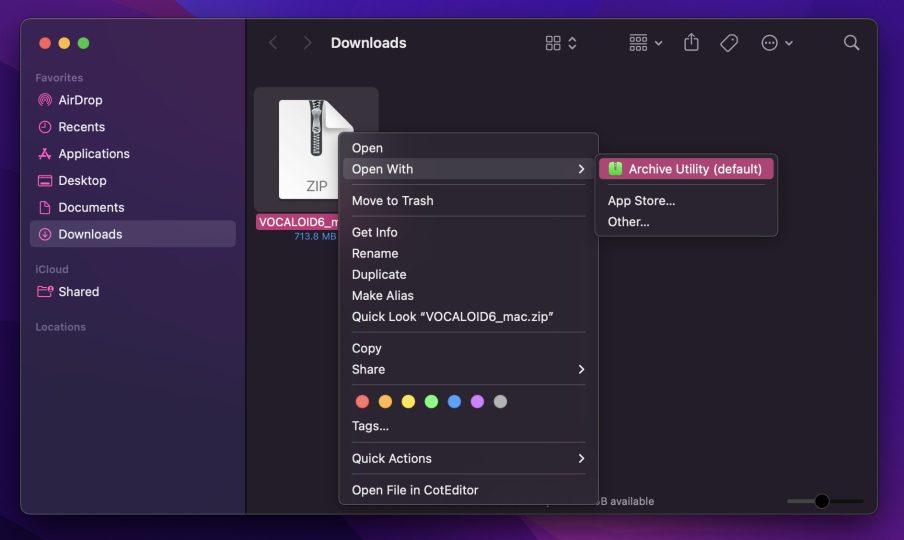
If the file is not automatically unzip, right-click (or control-click) the downloaded files and select [Open with>Archive utility (default)] to unzip the file.
3.Install VOCALOID6 Editor
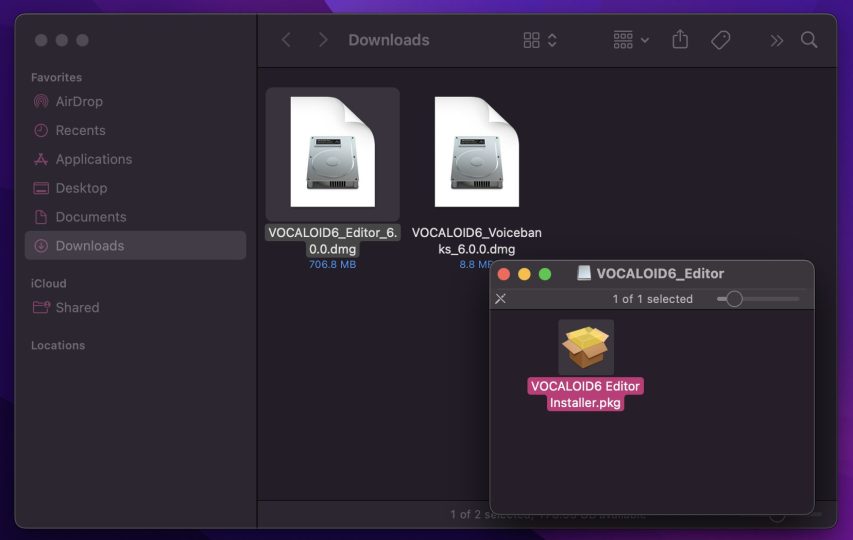
Install VOCALOID Editor. Open the folder and double-click to launch the file "VOCALOID6_Editor_6.0.0.dmg". A new window will open and the file "VOCALOID6 Editor Installer.pkg" will appear.
Double-click "VOCALOID6 Editor Installer.pkg" to launch the installer.
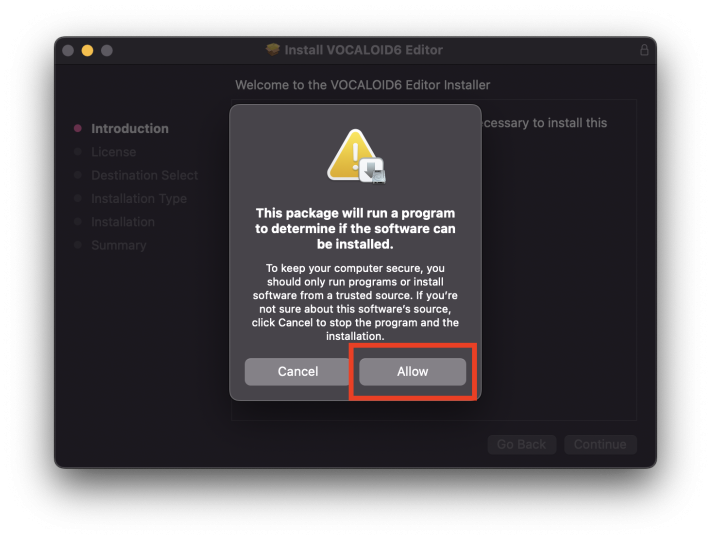
When the installer starts, the following confirmation message will appear. Click [Allow].
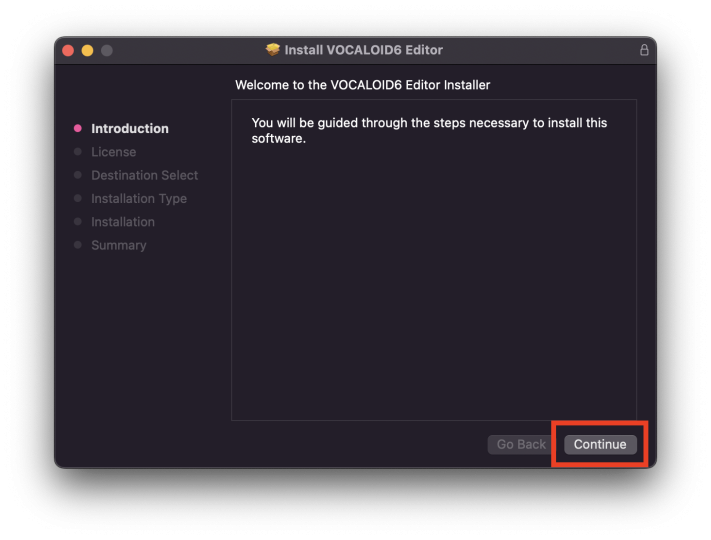
The installer has started. Click [Continue].
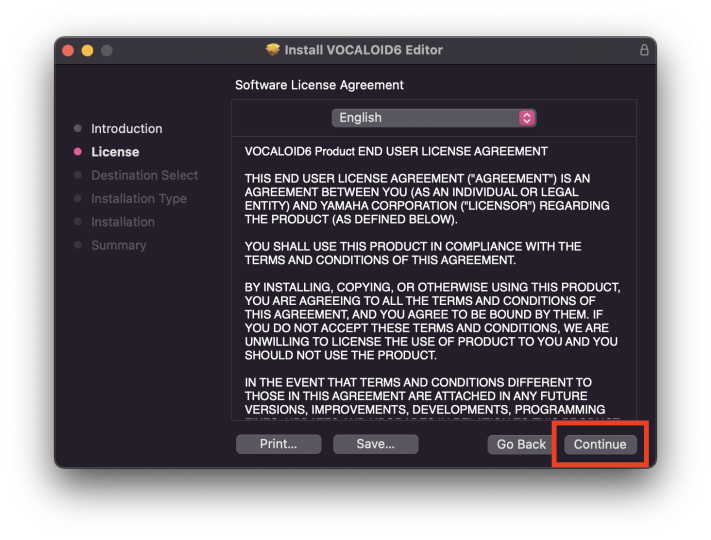
The "VOCALOID6 Product END USER LICENSE AGREEMENT" will appear. This agreement is the one that appears in any computer software. It describes what the user of the software must abide by.
Please read the contents and click [Continue] button.
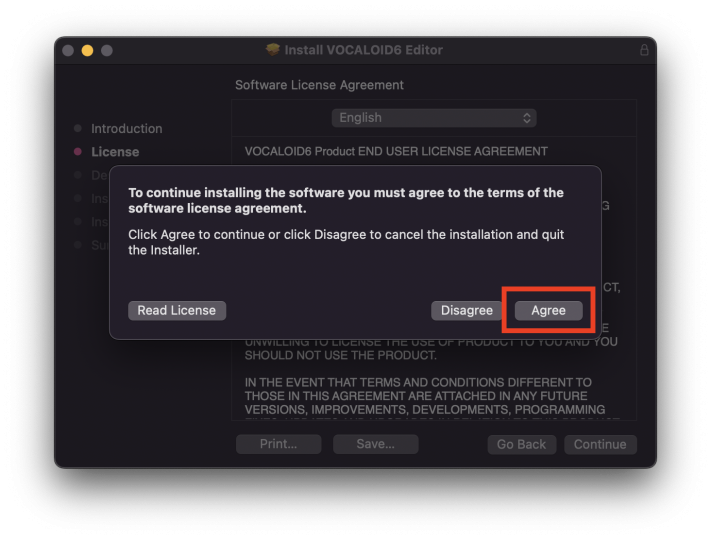
A message will appear asking if you accept "VOCALOID6 Product END USER LICENSE AGREEMENT". Click [Agree].
You can return to the previous page for reviewing the agreement by selecting [Read License].
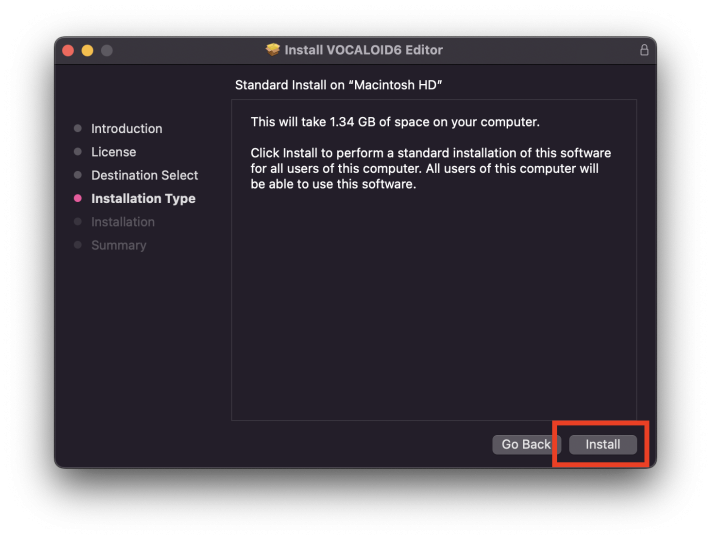
The location to be installed will appear. If there are multiple locations available for installation, you can change the destination. Select any location.
After confirming the contents, click [Install].
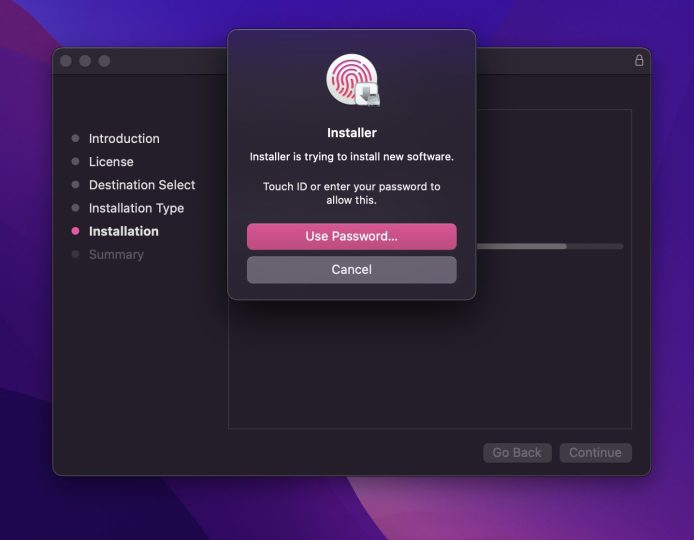
You need to allow VOCALOID6 Editor installation for Mac. Enter the password you have set on your Mac or use Touch ID to allow the installation.
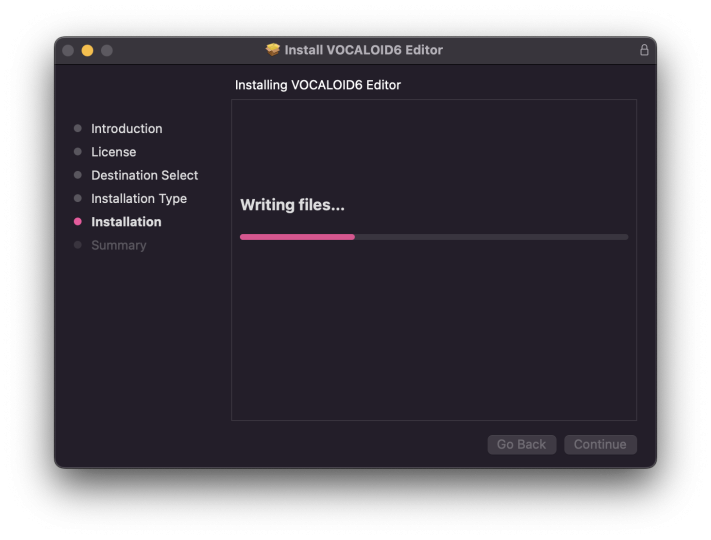
The installation will begin. Please keep the screen open and wait until the installation finishes. Please pay attention to the battery level.
The installation has completed when the following screen is displayed. Select [Close] to finish the installation process.
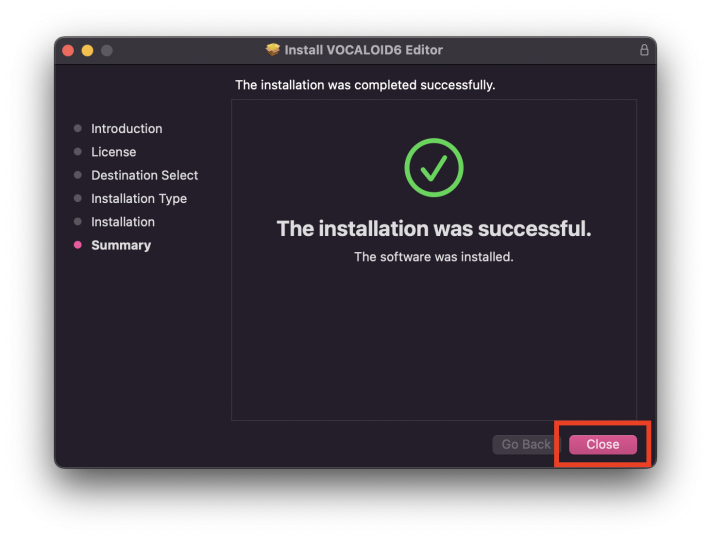
After installation is complete, a message may appear asking if you want to delete the installer. Since the installer is no longer required, there is no problem with deleting it.
4.Installation of Voicebanks
Next, let's install Voicebanks.
Open the folder downloaded in step 1, and double-click "VOCALOID6_Voicebanks_6.0.0.dmg".
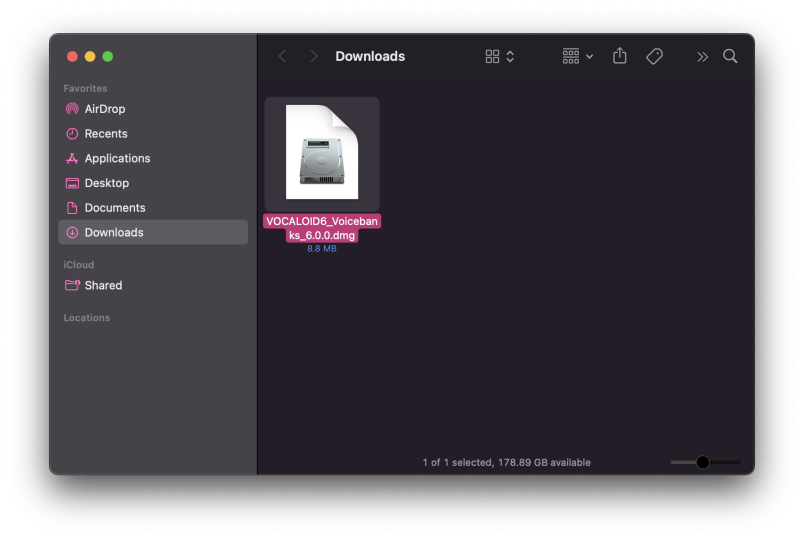
A new window will open and the file "VOCALOID6_Voicebanks_Installer.pkg" will appear. Double-click "VOCALOID6_Voicebanks_Installer.pkg" to launch the installer.
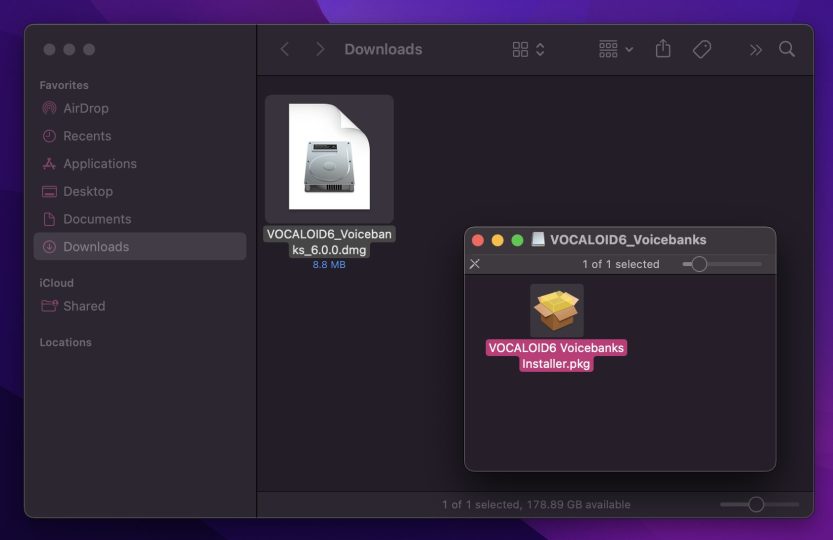
The installation steps is the same as the VOCALOID6 Editor installation. Please follow the instructions to proceed the installation.
When the following screen is displayed, the installation is complete.
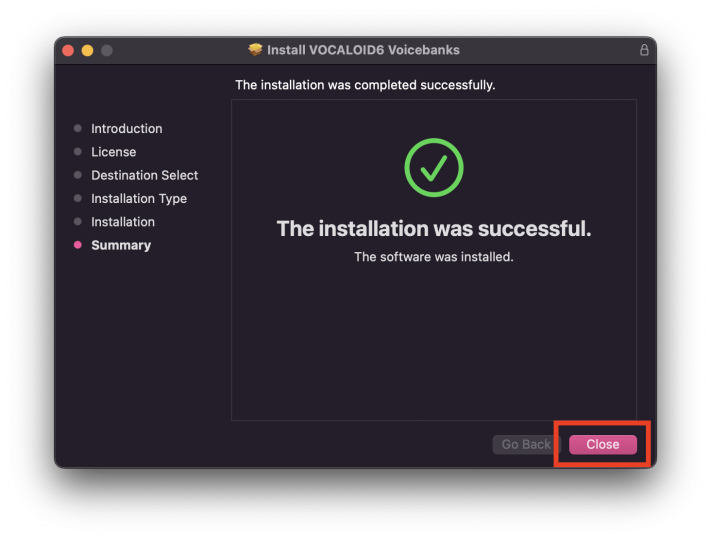
5. Startup and authentication of VOCALOID6 Editor
Let's launch VOCALOID6 Editor after installation.
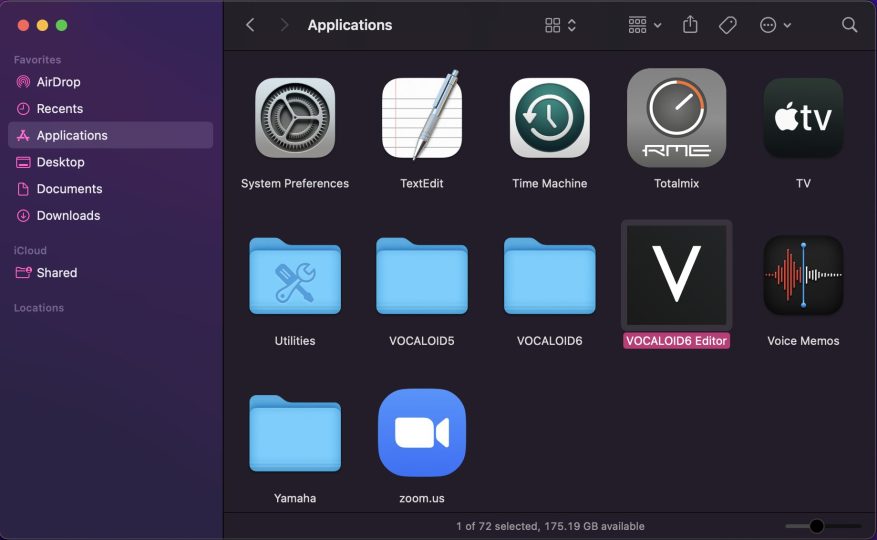
VOCALOID6 Editor is placed in the "Applications" folder. Open the Applications folder or click the Launchpad icon in the Dock and double-click the [VOCALOID6 Editor] icon to start it.
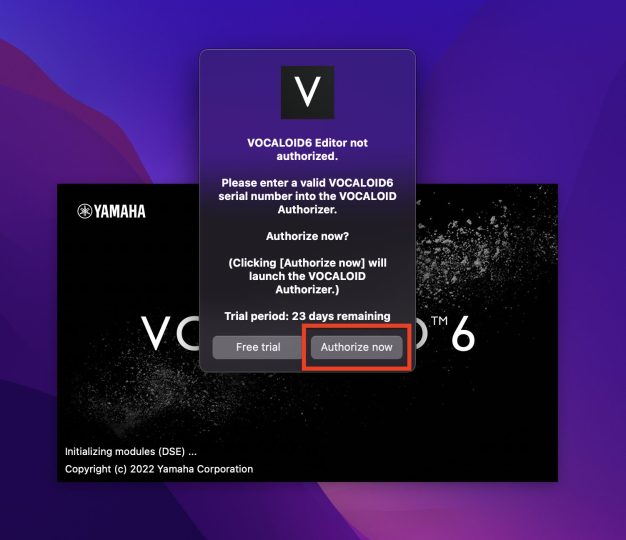
When you start VOCALOID6 Editor, the following message (Authorization screen) will appear.
Select [Authorize now].
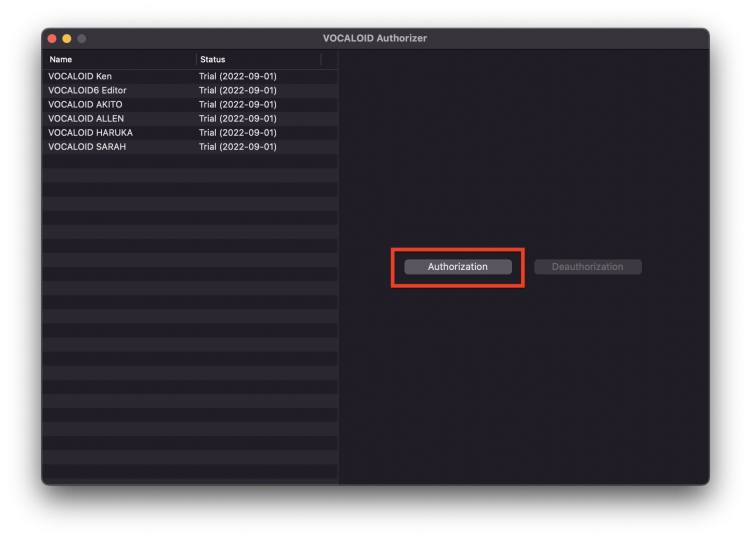
A separate software application called VOCALOID Authorizer, which is dedicated to authentication, will automatically start. This software is automatically installed when VOCALOID6 Editor is installed.
Select [Authorization].
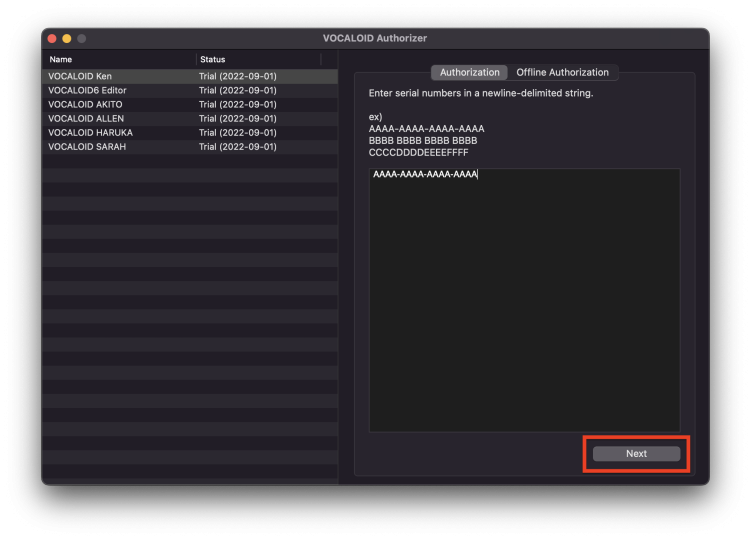
Enter the Serial code issued at the time of purchase in the [Authorization] area on the right side of the screen and select [Next].
*Serial codes can be found in order confirmation e-mails received when purchasing downloads at the VOCALOID SHOP.
*Internet connection environment is required for authorization.
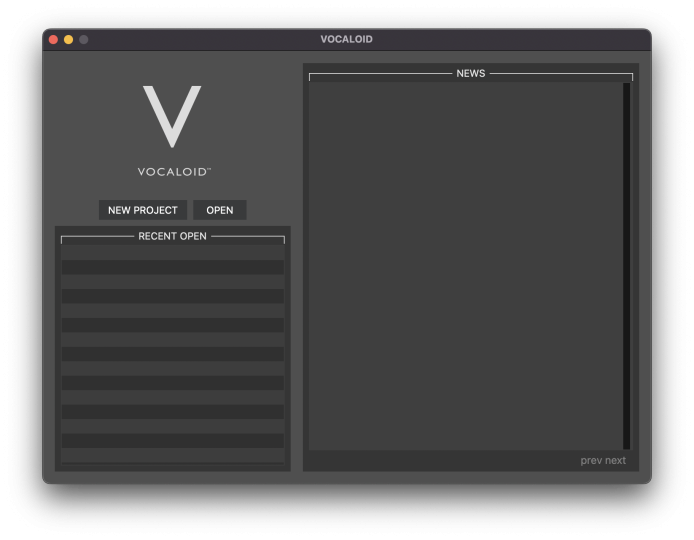
If the startup screen is displayed, all installation work is completed. Please enjoy VOCALOID6.
*The "NEWS" section of the screen varies depending on the time of year.
6.Install for an updater and an additional media
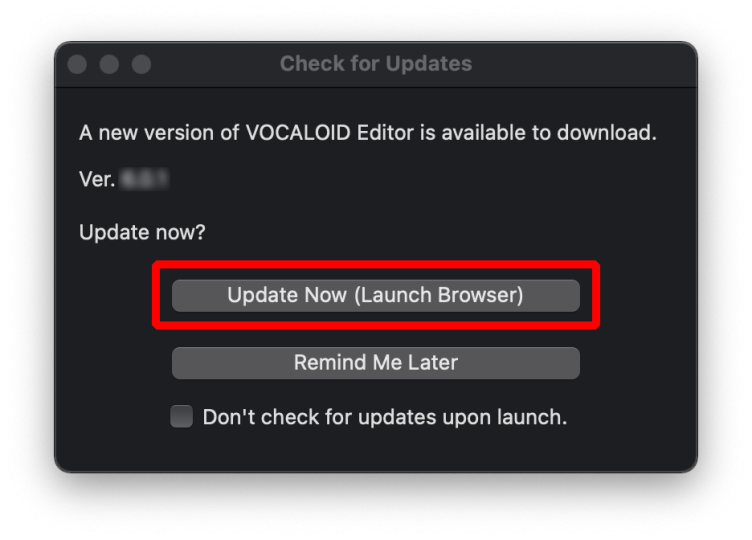
If the latest version is released when you start VOCALOID Editor (when updater is found), the following dialog box will appear. If displayed, select [Update Now] to update.
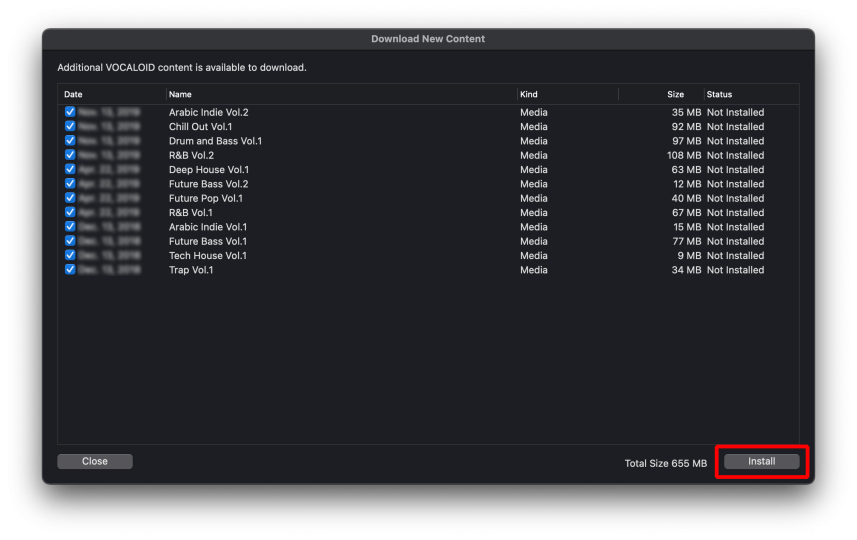
If any of the data used in VOCALOID Editor is found that has not been installed, the following dialog box will appear. The content of the display depends on the data found. Select the required data and choose [Install]. It is recommended that all be installed.
