2022.09.22
VOCALOID6 Setup guide for FL Studio
This article will explain how to use VOCALOID6 in FL Studio 20 (hereafter referred to as FL STUDIO) project. If you use VOCALOID6 in a FL STUDIO project, you can also record VOCALOID6 information in the FL Studio project.
*FL Studio doesn't support ARA2 (Audio Random Access 2) function. Transport (playback/stop etc.) of VOCALOID6 are not linked with FL Studio projects.
*This article uses images from the Windows version, but the Mac version looks almost the same. For Mac users. please use this article as a reference for the settings.
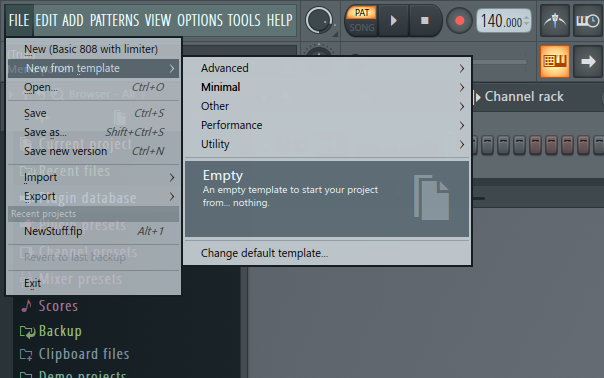
1. Start FL STUDIO and create a project
First, start FL STUDIO and create an empty project.
A project (with drums assigned as default) is automatically created at start up. but if you want to create completely an empty project. select [FILE > New from template > Empty].
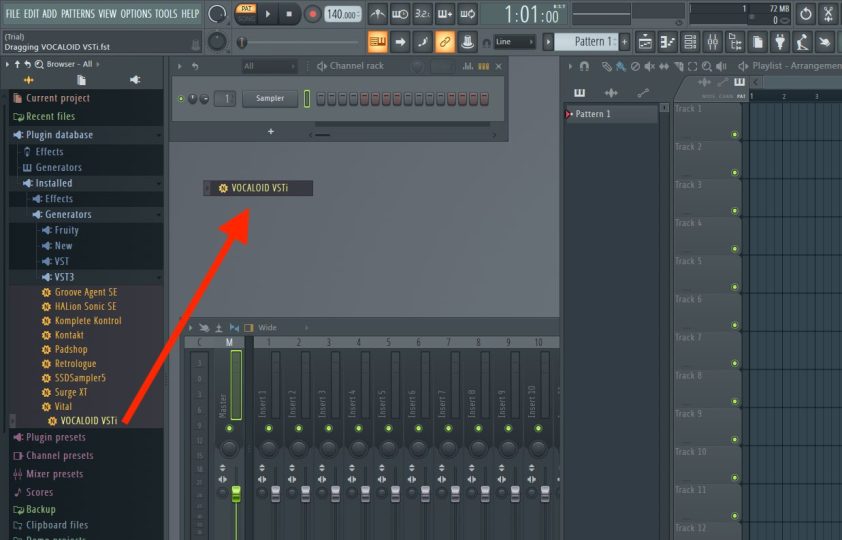
2. Assign VOCALOID to the channel rack
Select [Plugin Database > Installed > Generators > VST3 > VOCALOID VSTI] from the browser, and drag and drop on the screen.
*For Mac users, you can use either VST3 or Audio Units. The VST3 version is displayed as [VOCALOID VSTi] and the Audio Units version as [VOCALOID AU].
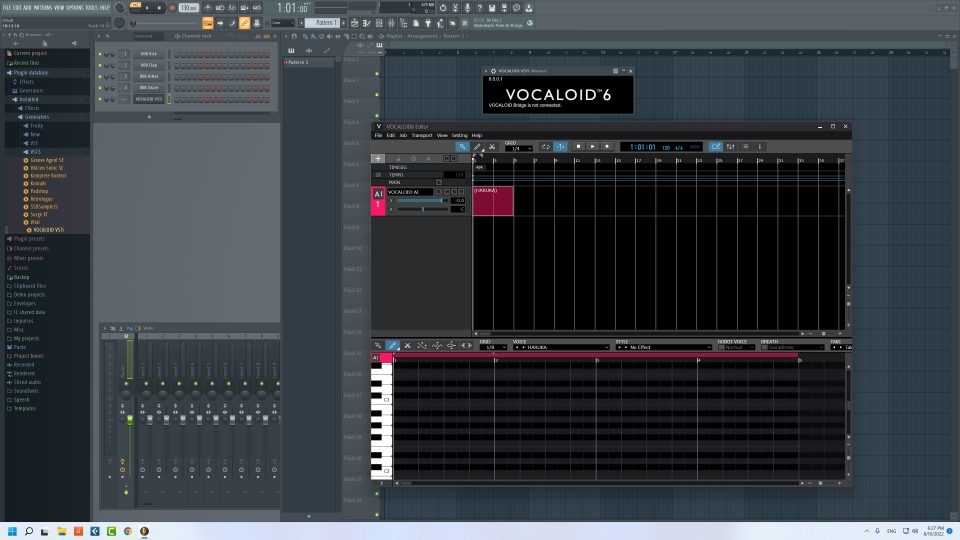
The setting of VOCALOID has been completed. in the FL STUDIO channel track.
Let's input the singing voice on the VOCALOID screen.
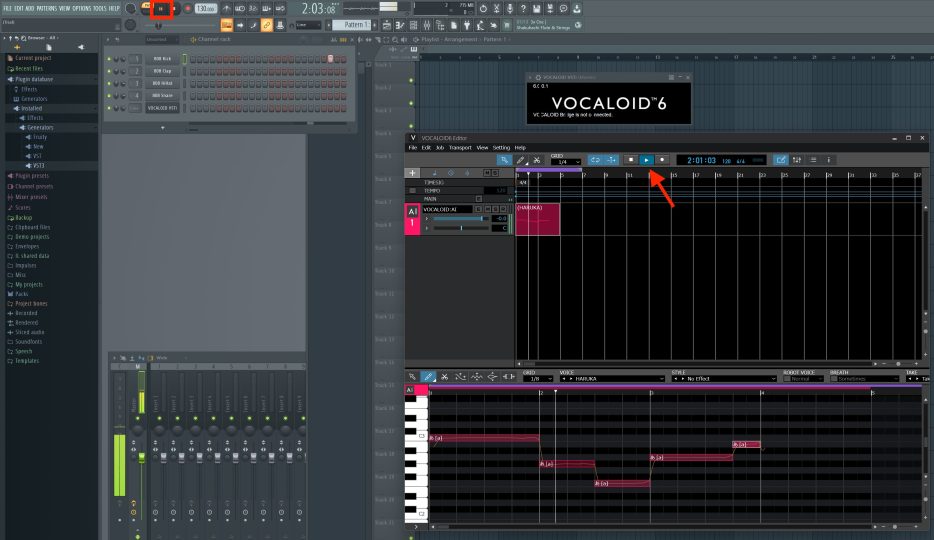
3. Confirm operation
Let's check if VOCALOID and Live are working properly.
Play and stop project by clicking the [Play] button in FL STUDIO. FL STUDIO will play and stop in conjunction with Live.
* The Playback of FL Studio will not be synchronized by clicking VOCALOID [Play] button. Also, regardless of the song position (Playback position) on VOLALOID, it will be played from the song position in FL STUDIO.
The settings for VOCALOID has been completed in FL Studio.