2022.12.08
“Let’s have fun with VOCALOID!” vol.4 -Importing data and using Mixer-
Hello everyone! Thank you for reading "Let's have fun with VOCALOID!"
In the first three articles, we input the melody for “Chorus of Frogs” in VOCALOID Editor, and practiced basic skills for using VOCALOID. From this fourth article, we will raise the level a little.
Using VOCALOID6 demo song data, we will have VOCALOID sing along with karaoke (an instrumental), “Making VOCALOID Sing.” In the fourth article, we will explain how to load a karaoke sound source and adjust levels and sound characteristics.
Please try doing it!
You can download VOCALOID6 Free Trial Version!
Please check an article which includes explanation for Installation and Authorization of VOCALOID6 free trial version.
Downloading data
Before starting the project, let us download the data we will use in the article. Click the download button.
The file is compressed, so decompress it and put it on your desktop or another easy to find place.
Importing karaoke data
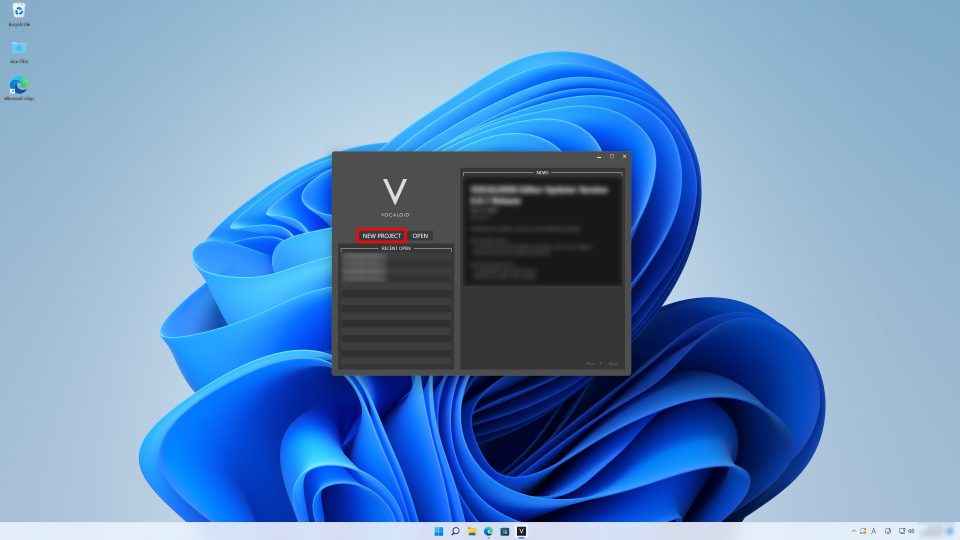
Now, launch VOCALOID, and select “NEW PROJECT” to create a new project.
Load the karaoke data into the project you created. Loading data is called “importing” in audio production software.
Drag and drop the karaoke file that you saved into VOCALOID6 Editor.
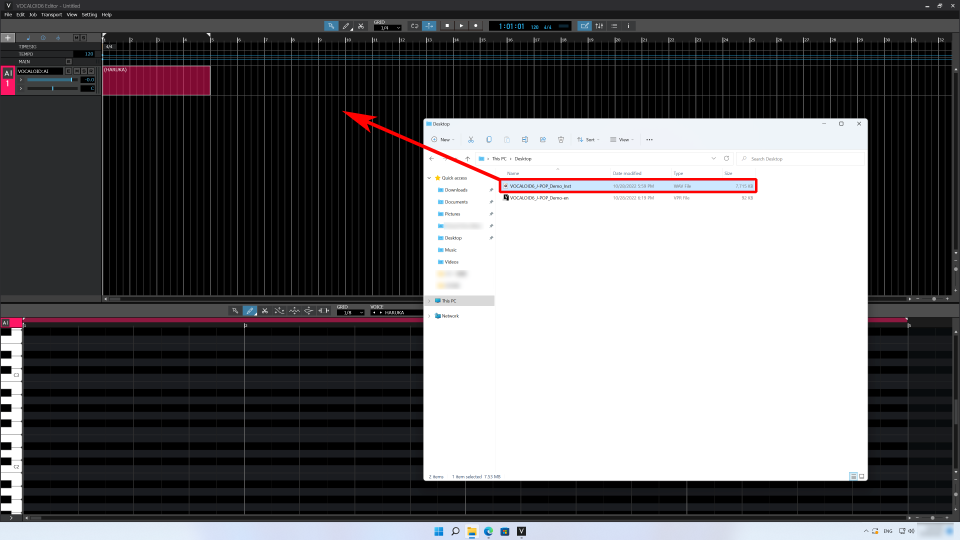
The karaoke file will be imported, and a track will be created automatically.
If the beginning of the karaoke file is not aligned with the beginning of the project, adjust it. Grab the imported karaoke file and shift it forward.
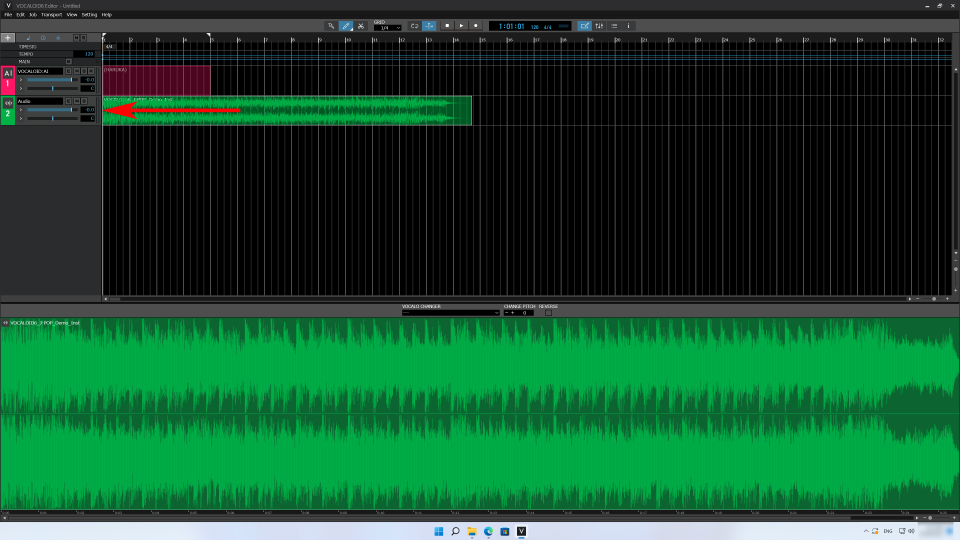
After importing and aligning the file, play it to confirm that you can hear sound. If you can hear sound, importing has been successful.
Importing melodies (project files)
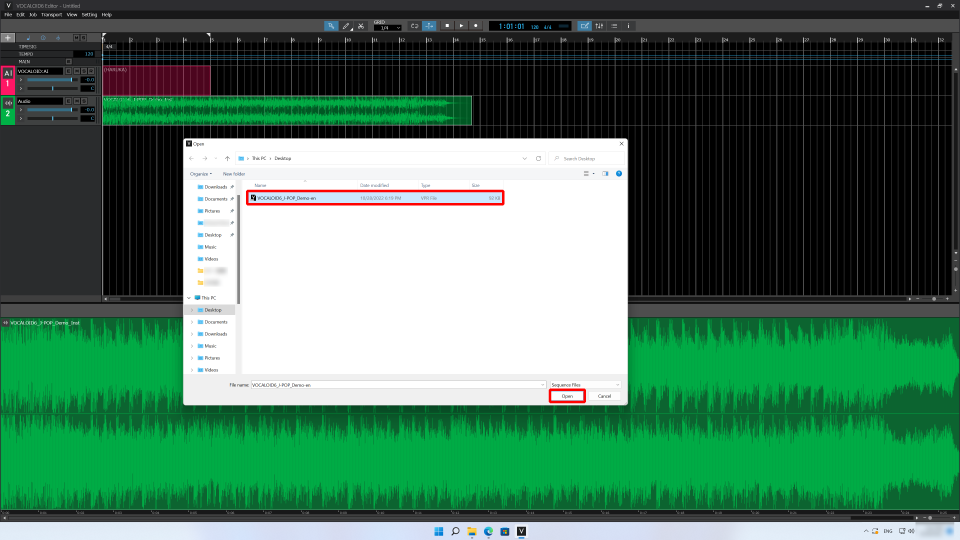
Next, we will import a VOCALOID project file that includes data that has already been input. VOCALOID Editor project files use the VPR format. Use the File menu to import a VPR file.
Select “Import File…” from the File menu at the top left. “VOCALOID6_J-POP_Demo-en.vpr” is one of the downloaded files. Select this, and select “Open”.
Doing this will open the “Import tempo and time signature?” dialog. Select “Yes”.
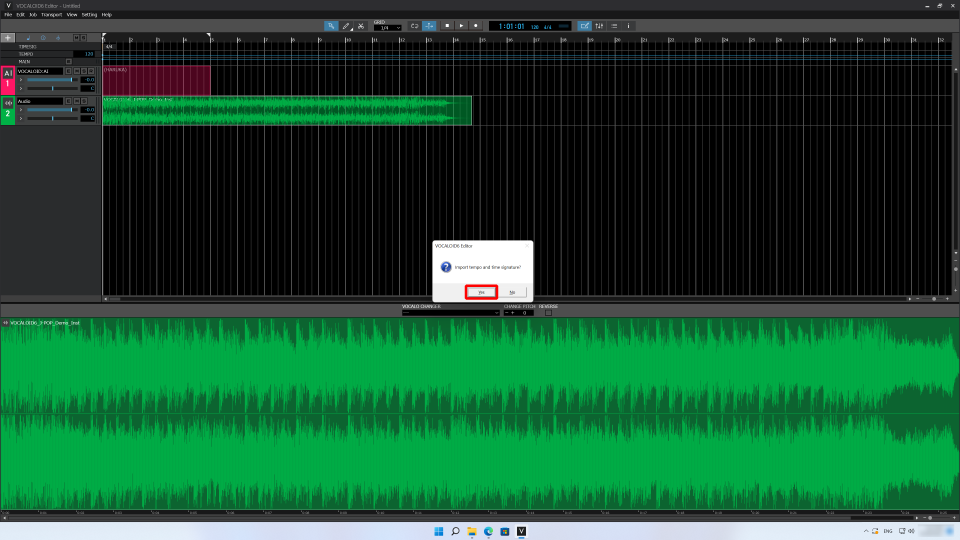
Tempo is the speed of the music. The time signature is a way of defining the smallest unit of a song as 3 or 4 beats. The demo data that we are using this time contains tempo and time signature information, so let’s import it all together.
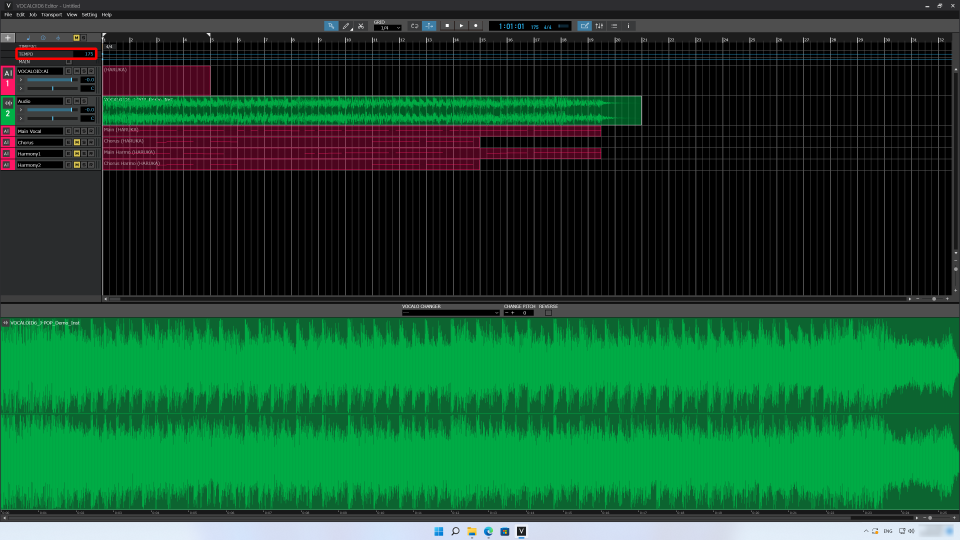
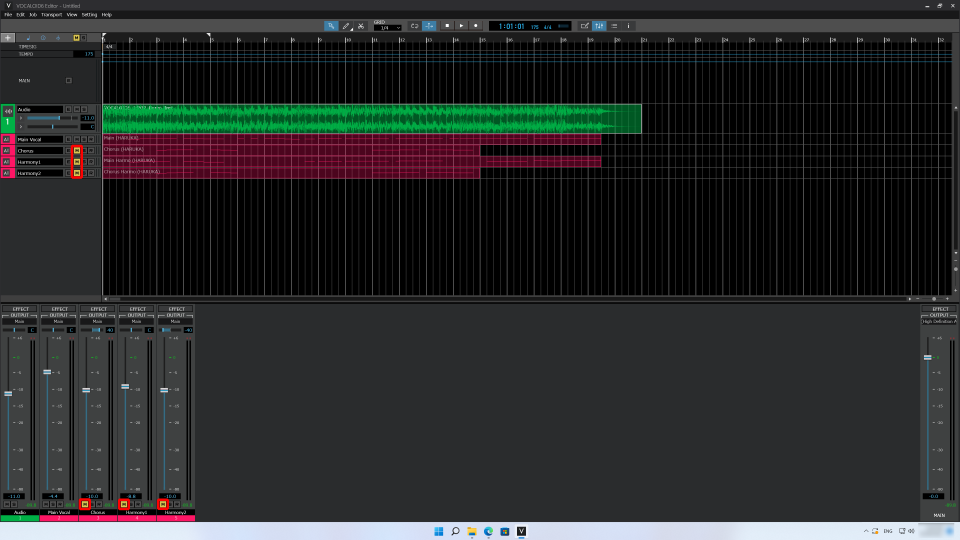
After importing successfully, 4 tracks will be shown: Main Vocal, Chorus, Harmony1 and Harmony2. Moreover, the value shown on the TEMPO track will be 175. “175” is the tempo of the song.
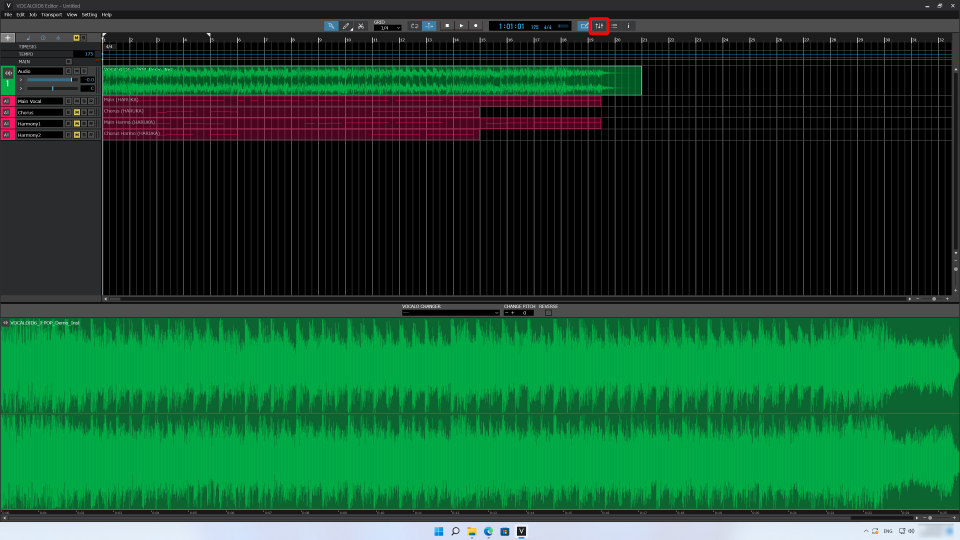
The “VOCALOID:AI” track at the top was created automatically when we made the project. We are not going to use it, so let’s delete it.
Select the track so that its color is inverted. In this state, right-click near the track name to open a menu. Select “Delete” from the menu to delete the track.

Adjusting levels to prevent distortion
Next let’s learn how to adjust volume levels.
When creating music using a computer, including with VOCALOID, making sure that sounds do not distort is very important. When the volume level is too high, we call this “overloading.” When overloading occurs, the output becomes distorted and sounds unpleasant.
To prevent overloading, let’s make it is so we can monitor the output sound. We will show the Mixer to adjust and monitor volume levels.
After opening the Mixer Screen, we will play the project.
Now, look at the vertical fader in the MAIN section at the right edge of the Mixer Screen. When the red dots light at the top of the meters, the level is overloading. Let’s try playing the music.
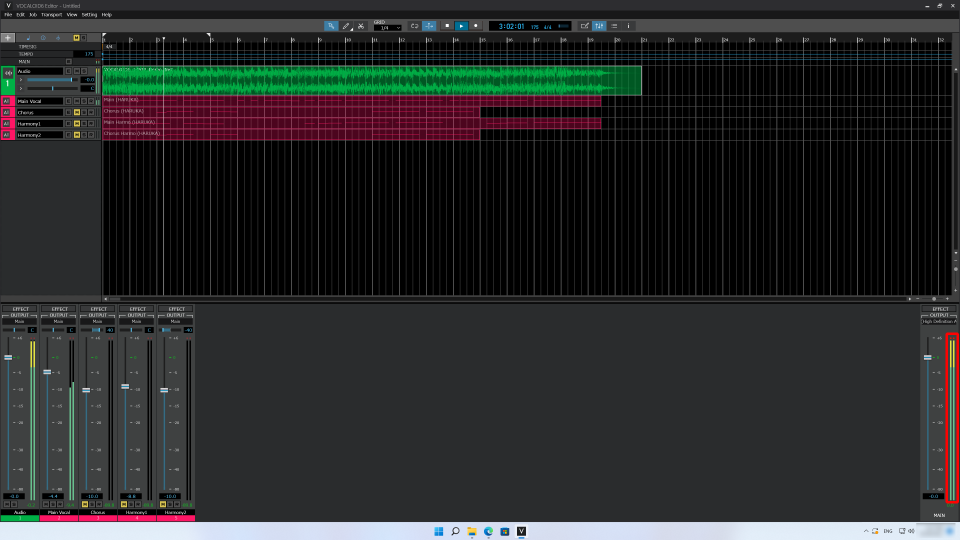
Lower the levels of the “karaoke” and “Main Vocal” tracks so that the meters do not light red. Volume levels can be reduced by lowering the controls called “faders” on the tracks.
In this project, the level of the “karaoke” track is on the high side, so let’s lower its volume.
Let’s lower it until the number below the fader is about −11.0. After lowering the faders, let’s play it again.

If the MAIN track meters do not become red, we are finished making adjustments. Whenever working on a project, always be careful not to let the MAIN meters become red.
In general, a good practice is to adjust levels so the MAIN meters stay around the yellow range when the volume is loudest.
In addition to the Mixer Screen, the MAIN track meters can be checked in another place. By increasing the height of the MAIN track on the Main Screen, we can make the MAIN track meters easier to check.

Try playing other tracks
We adjusted the karaoke and main vocal tracks. Let’s try playing other tracks.
On the Mixer Screen, there are M, S and R buttons at the bottom of each track. These buttons are abbreviations: M for “Mute”, S for “Solo” and R or “Record”.
When M is lit, the track’s sound will not be output. Let’s press the M buttons for Chorus, Harmony 1 and Harmony 2 to unmute them.
The M buttons for each track at the top of the screen have the same function. Let’s play it.
Playing it, we can now hear the chorus part that follows the main vocal and harmonizing voices.
When the number of sounds increases, the overall volume also goes up, making overloading more likely. Check the MAIN meters again, and lower the levels of each track if necessary.

Change stereo positioning
Finally, let’s try adjusting the stereo positions of sounds.
Headphones and speakers come in sets of two —left and right— and it’s possible to position sounds between the left and the right. The parameter used to adjust the stereo left-right position is called “PAN” for panning.
On the Mixer Screen, the sliders above the faders and meters are for panning. Try moving the Pan Slider for the main vocal track left and right during playback.

Usually, vocals are placed right in the center. Set the Main Vocal track panning so that “C” appears. “C” means “center.”
Let’s set the panning of other tracks off center. Set Chorus to −50, Harmony 1 to 25 and Harmony 2 to 50. Positive values are to the right and negative values are to the left.

When played, the main vocal can be heard centered, the chorus left and harmonies right. Let’s play it.
This is how we adjust volume levels and stereo panning to develop our production.
Thank you for reading!
In the next article, we will duplicate the chorus and harmony parts and make other adjustments to create an even fuller sound. Please enjoy using the functions of VOCALOID6 to produce music.
Anyone can experience the joy of arranging music, so please watch the next video too. See you soon!